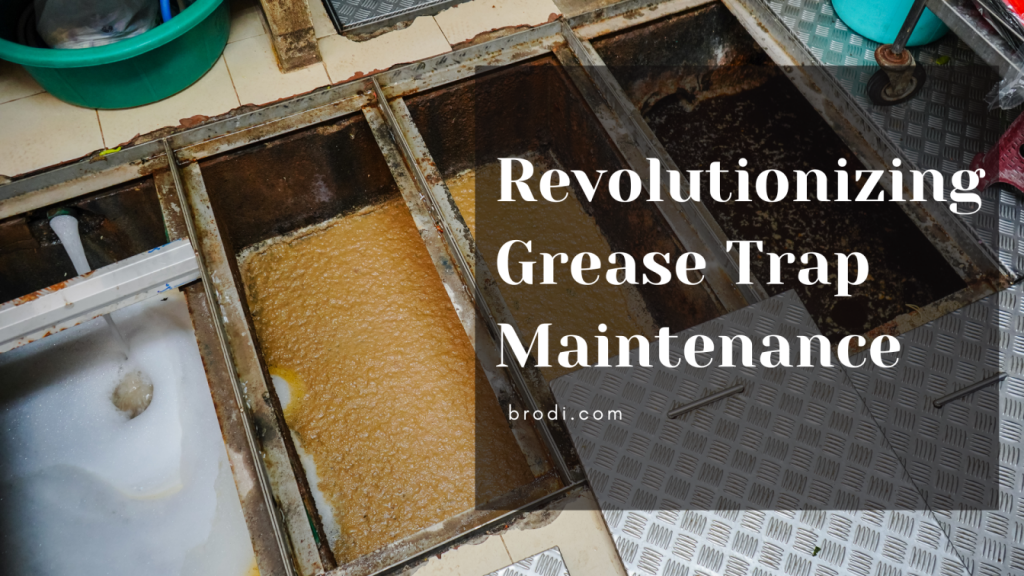
Are you tired of dealing with clogged drains and foul odors caused by grease buildup in your grease trap? We have the perfect solution for you!
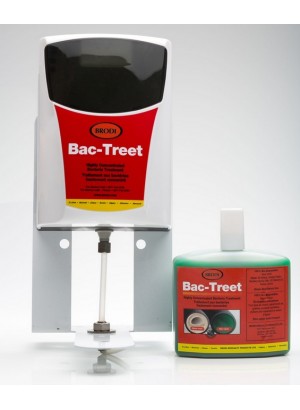
Introducing Bac-Treet, the revolutionary bacterial treatment specifically designed to revolutionize grease trap maintenance. With its powerful and efficient formula, Bac-Treet is set to transform the way grease traps are maintained, leaving no trace of grease buildup behind.
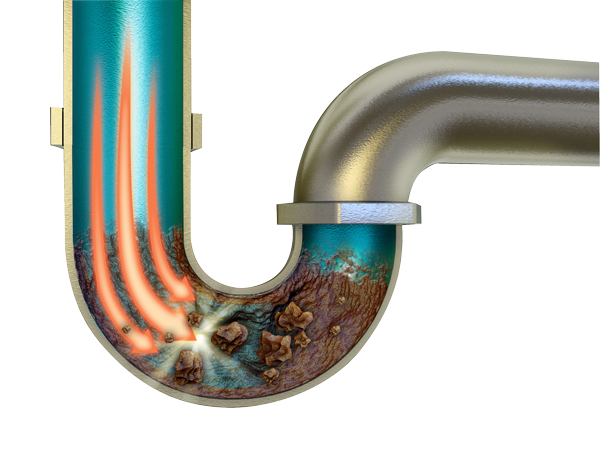
Unlike manual bacterial treatments, Bac-Treet utilizes a highly active blend of specially selected microbes that quickly break down fats, oils, and grease (FOG) in your grease trap. This cutting-edge technology ensures that your grease trap remains clean and odor-free, preventing costly blockages and potential health hazards.
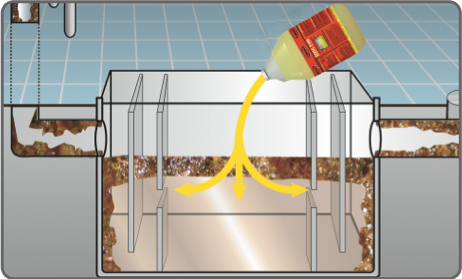
Bac-Treet is easy to use, requiring no special equipment or training. Simply add the treatment directly into your grease trap, and let the powerful bacteria work their magic. Experience the power of ATC Bac-Treet and wave goodbye to grease trap maintenance headaches forever. Say hello to a clean and efficient grease trap with Bac-Treet. Try it today and see the difference for yourself.
Understanding The Limitations of Manual Bacterial Treatment
Maintaining a clean and efficient grease trap is essential for any establishment that deals with grease and oil on a regular basis. Grease traps are designed to capture and separate fats, oils, and grease from wastewater, preventing them from entering the sewage system and causing blockages. However, over time, grease can accumulate in the trap, leading to clogged drains, foul odors, and potential health hazards.
Proper maintenance of grease traps ensures that they function effectively, preventing costly repairs and disruptions to your business. Regularly cleaning and treating your grease trap not only extends its lifespan but also helps maintain a hygienic and odor-free environment. Neglecting grease trap maintenance can result in expensive plumbing repairs, fines from regulatory authorities, and a negative impact on your business’s reputation.
Introducing The Bac-Treet Starter Pack and Its Benefits
Traditional manual bacterial treatments have long been used to break down grease in grease traps. These treatments typically involve adding bacteria or enzymes to the grease trap, hoping that they will digest the fats, oils, and grease over time. While manual treatments can be effective to some extent, they often have limitations that can hinder their overall performance.
One of the main limitations of manual bacterial treatments is the lack of control over the types and quantities of bacteria introduced into the grease trap. Different bacteria have varying capabilities to break down grease, and using the wrong strains or insufficient quantities may result in suboptimal performance. Additionally, manual treatments may require frequent reapplications to maintain effectiveness, leading to additional costs and effort.
Another drawback of manual treatments is the time it takes for the bacteria to break down the grease. Manual treatments often require extended periods of time to fully digest the fats, oils, and grease in the trap, leaving room for potential buildup and blockages. This can lead to unpleasant odors, clogged drains, and increased maintenance requirements.
How Bac-Treet Revolutionizes Grease Trap Maintenance
Bac-Treet Starter Pack is a game-changer in grease trap maintenance. Unlike traditional manual bacterial treatments, Bac-Treet utilizes a highly active blend of specially selected microbes that are specifically designed to target and break down fats, oils, and grease in grease traps. This advanced formula ensures rapid and efficient digestion of grease, eliminating the need for prolonged treatment periods.
The key benefit of Bac-Treet is its ability to prevent grease buildup and minimize the risk of clogged drains and foul odors. By introducing powerful bacteria into the grease trap, Bac-Treet quickly breaks down even the toughest grease deposits, leaving your grease trap clean and odor-free. This not only improves the overall functionality of the grease trap but also enhances the hygiene and cleanliness of your establishment.
Another advantage of Bac-Treet is its ease of use. Unlike manual bacterial treatments that may require specialized equipment or training, Bac-Treet can be easily applied directly into the grease trap. Simply follow the instructions provided, and let the powerful bacteria do their work. This simplicity saves you time and effort, allowing you to focus on other aspects of your business.
Step-by-step Guide to Using Bac-Treet for Grease Trap Maintenance
Using Bac-Treet for grease trap maintenance is simple and straightforward. Follow these step-by-step instructions to ensure optimal results:
Installation: Open the BAC TREET device and insert the provided batteries. Securely place the unit in proximity to the grease trap or drainage area.
Feeder Hoses: Route and install feeder hoses as per directions.
Activation: Turn on the device and set the frequency required. activate the bacterial treatment. The system will release a controlled dose of bacteria into the grease trap at regular intervals.
Routine Maintenance: For optimal results, maintain a consistent treatment schedule based on the manufacturer’s recommendations. Regular use ensures continuous bacterial activity.
Monitoring: Monitor the device’s indicator lights to track battery life and bacterial treatment levels. Replace batteries as needed, and refill the bacterial solution according to the product guidelines.
Refill Process: When the bacterial solution is depleted, follow the easy refill process provided with the BAC TREET Starter Pack. This typically involves adding a new bacterial cartridge or solution container.
By following these simple steps, you can effectively maintain your grease trap and experience the full benefits of ATC Bac-Treet.
Comparing The Costs and Effectiveness of Manual Bacterial Treatment VS. Bac-Treet
When considering grease trap maintenance options, it is important to compare the costs and effectiveness of manual bacterial treatment and Bac-Treet. While manual treatments may initially seem more affordable, the long-term costs and benefits need to be taken into account.
Manual treatments often require frequent reapplications to maintain effectiveness. This can lead to additional costs in terms of purchasing bacterial products and investing time in the application process. Additionally, the extended treatment periods of manual treatments may result in increased maintenance requirements and potential business disruptions.
On the other hand, Bac-Treet offers a cost-effective and efficient solution. The powerful formula of Bac-Treet ensures rapid and thorough grease digestion, reducing the need for frequent reapplications. This saves you time, effort, and money in the long run. Furthermore, the prevention of clogged drains and foul odors through the use of Bac-Treet minimizes the risk of costly plumbing repairs and potential fines.
When considering the overall effectiveness and cost-efficiency, Bac-Treet proves to be a superior choice for grease trap maintenance.
Ready to experience the power of Bac-Treet for yourself? You can purchase Bac-Treet by clicking here
Are you tired of worrying about your electronics getting wet? Water damage can be a real nightmare. But fear not! In this article, we’ll show you a simple and effective solution: rubberized spray.
Rubberized spray is a product that forms a protective barrier around your electronics, making them completely waterproof. By creating a flexible and durable coating, it prevents water from seeping into your devices and causing damage. This means you can confidently use your gadgets in any weather conditions or even take them for a swim!
Not only does rubberized spray provide waterproof protection, but it also guards against dust, dirt, and impact damage. It’s like a shield for your electronics, ensuring they stay in top-notch condition for longer. And the best part is, applying rubberized spray is a breeze. With just a few simple steps, you can transform your gadgets into water-resistant powerhouses.
So don’t let the fear of water damage hold you back. With rubberized spray, you can enjoy your electronics worry-free, knowing they’re protected from the elements. Get ready to make a splash with waterproof gadgets!
The Importance of Waterproofing Electronics
Water damage is one of the most common and costly issues faced by electronic device owners. Waterproofing your electronics is essential to ensure their longevity and maintain their functionality.
When your electronics are waterproofed, there’s no need to panic if they accidentally come into contact with water. You can confidently take your devices to the beach, or pool, or even use them in the rain without worrying about potential damage. Waterproofing provides peace of mind and allows you to enjoy your gadgets in any environment fully.
Understanding Rubberized Spray
Rubberized spray is a revolutionary product designed specifically for waterproofing electronics. It is a liquid coating that forms a protective layer when applied to the surface of your devices. This coating is made from a combination of rubber and other materials that create a flexible and durable barrier against water, dust, dirt, and impact damage.
The rubberized spray is available in aerosol cans, making it easy to apply evenly to your electronics. It dries quickly, forming a seamless and transparent coating that doesn’t interfere with the functionality or aesthetics of your devices. The spray can be used on a wide range of electronic devices, including smartphones, tablets, cameras, headphones, and even circuit boards.
Benefits of using rubberized spray for waterproofing
Using rubberized spray to waterproof your electronics offers several benefits that go beyond just protecting them from water damage. Here are some of the key advantages:
1. Waterproof Protection: Rubberized spray creates a waterproof barrier that prevents water from seeping into your devices, keeping them safe from damage.
2. Dust and Dirt Resistance: The protective coating also guards against dust and dirt, ensuring your electronics stay clean and free from debris.
3. Impact Resistance: The flexible nature of the rubberized coating provides an extra layer of protection against accidental drops or impacts.
4. Easy Application: Applying rubberized spray is a simple process that can be done by anyone. It requires minimal tools and expertise, making it accessible to all users.
5. Transparent and Non-Intrusive: The spray dries to a transparent finish, allowing you to maintain the original look and feel of your electronics.
6. Cost-Effective: Waterproofing your electronics with rubberized spray is a cost-effective solution compared to purchasing expensive waterproof devices.
With these benefits in mind, it’s clear that rubberized spray is the ideal choice for anyone looking to protect their electronics from water damage and extend their lifespan.
Steps to Waterproof your Electronics with Rubberized Spray
Now that you understand the importance of waterproofing and the benefits of rubberized spray, let’s dive into the step-by-step process of waterproofing your electronics.
1. Preparing Your Electronics for Waterproofing
Before applying rubberized spray, it’s crucial to prepare your electronics properly. Follow these steps:
1. Power Off: Turn off your electronic device to avoid any potential damage during the waterproofing process.
2. Clean: Remove any dirt, dust, or debris from the surface of your device using a soft cloth or brush.
3. Masking: Use masking tape to cover any areas that you don’t want to be coated, such as buttons, ports, and camera lenses.
4. Disassemble (if necessary): If your device is easily disassembled, consider removing components to ensure a thorough coating.
2. Applying Rubberized Spray to Your Electronics
Once your electronics are prepared, you can begin applying the rubberized spray. Follow these steps:
1. Shake the Can: Shake the aerosol can of rubberized spray thoroughly to ensure a proper mixture of the coating.
2. Spray Evenly: Hold the can about 6 inches away from your device and apply an even layer of the spray, moving in a sweeping motion.
3. Multiple Coats: Apply multiple coats for maximum protection, allowing each coat to dry completely before applying the next one.
4. Check for Coverage: Ensure that the entire surface of your device is evenly coated with the rubberized spray.
3. Curing and Testing the Waterproofing
After applying the rubberized spray, it’s important to allow it to cure properly and test the waterproofing. Follow these steps:
1. Curing Time: Let your device sit for the recommended curing time mentioned on the rubberized spray can. This allows the coating to fully bond and create a strong barrier.
2. Water Test: Fill a basin or sink with water and carefully submerge your device. Leave it underwater for a few minutes to test the effectiveness of the waterproofing.
3. Inspect for Leaks: After the water test, remove your device from the water and dry it off. Inspect it thoroughly for any signs of water leakage. If there are no leaks, your device is successfully waterproofed.
Additional tips for successful waterproofing with rubberized spray
While the process of waterproofing your electronics with rubberized spray is relatively straightforward, there are a few additional tips to keep in mind for optimal results:
1. Choose the right product: Not all rubberized sprays are created equal. Be sure to choose a high-quality product that is specifically designed for electronics waterproofing. This will ensure the best protection and longevity for your devices.
2. Apply multiple thin coats: It’s better to apply several thin coats of rubberized spray rather than one thick coat. This will allow for better adhesion and flexibility, reducing the risk of cracking or peeling over time.
3. Reapply as needed: Over time, the rubberized coating may wear off or become damaged. If you notice any signs of wear or water penetration, it’s important to reapply the rubberized spray to maintain the waterproofing protection.
4. Avoid extreme temperatures: While rubberized spray is designed to withstand a wide range of temperatures, extreme heat or cold can affect its performance. Avoid exposing your waterproofed electronics to extreme conditions for extended periods of time.
By following these additional tips, you can ensure that your electronics remain waterproof and protected for years to come.
Common mistakes to avoid when waterproofing electronics
While waterproofing your electronics with rubberized spray is a straightforward process, there are a few common mistakes that you should avoid:
1. Skipping the preparation: Properly preparing your electronics before applying the rubberized spray is crucial for optimal adhesion and waterproofing. Skipping this step can result in a subpar finish and reduced effectiveness.
2. Applying too thick of a coat: Applying a thick layer of rubberized spray may seem like it provides extra protection, but it can actually lead to cracking or peeling over time. Stick to thin, even coats for the best results.
3. Not allowing for adequate drying time: Rushing the drying process can result in a tacky or uneven finish. Be sure to follow the manufacturer’s instructions for curing and drying to ensure a durable and effective waterproofing coating.
4. Neglecting to reapply as needed: Over time, the rubberized coating may wear off or become damaged. It’s important to regularly inspect your electronics for any signs of wear and reapply the rubberized spray as needed.
By avoiding these common mistakes, you can ensure that your electronics are properly waterproofed and protected.
Conclusion
With the help of rubberized spray, you can now enjoy your electronics worry-free, knowing they are protected from water damage. By following the steps outlined in this article, you can confidently waterproof your devices and extend their lifespan.
Remember to properly prepare your electronics, apply the rubberized spray in thin, even coats, and allow for adequate drying and curing time. Test the waterproofing by submerging your devices in water and inspecting for any signs of water penetration. And don’t forget to reapply the rubberized spray as needed to maintain optimal protection.
So don’t let the fear of water damage hold you back. With rubberized spray, you can make a splash with your waterproofed gadgets and enjoy them in any weather conditions or outdoor adventures. Say goodbye to water damage worries and hello to worry-free electronics!
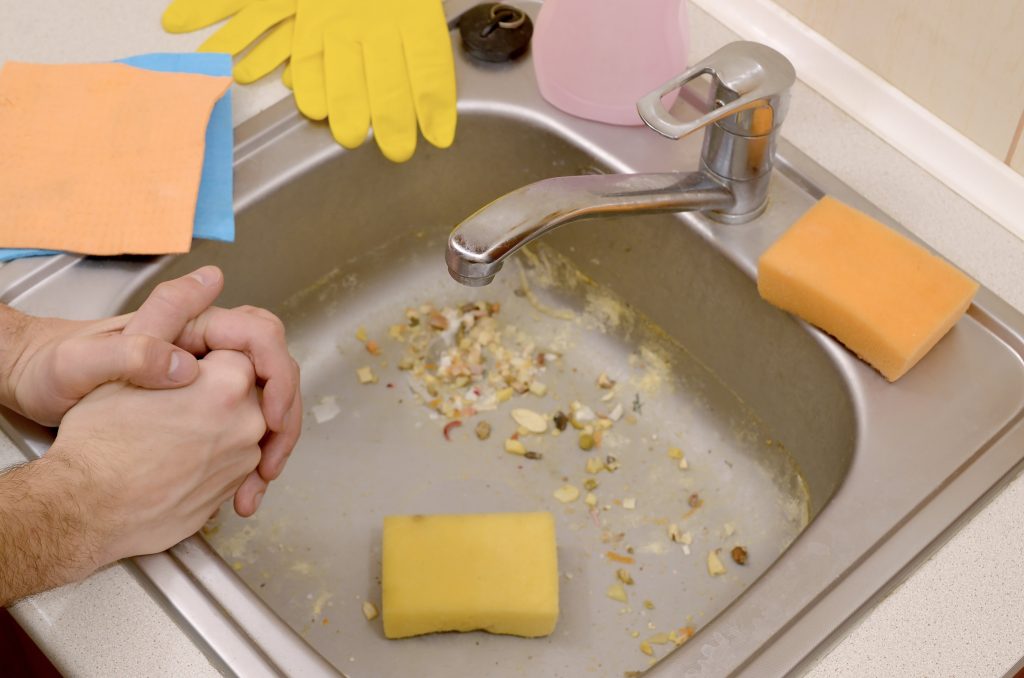
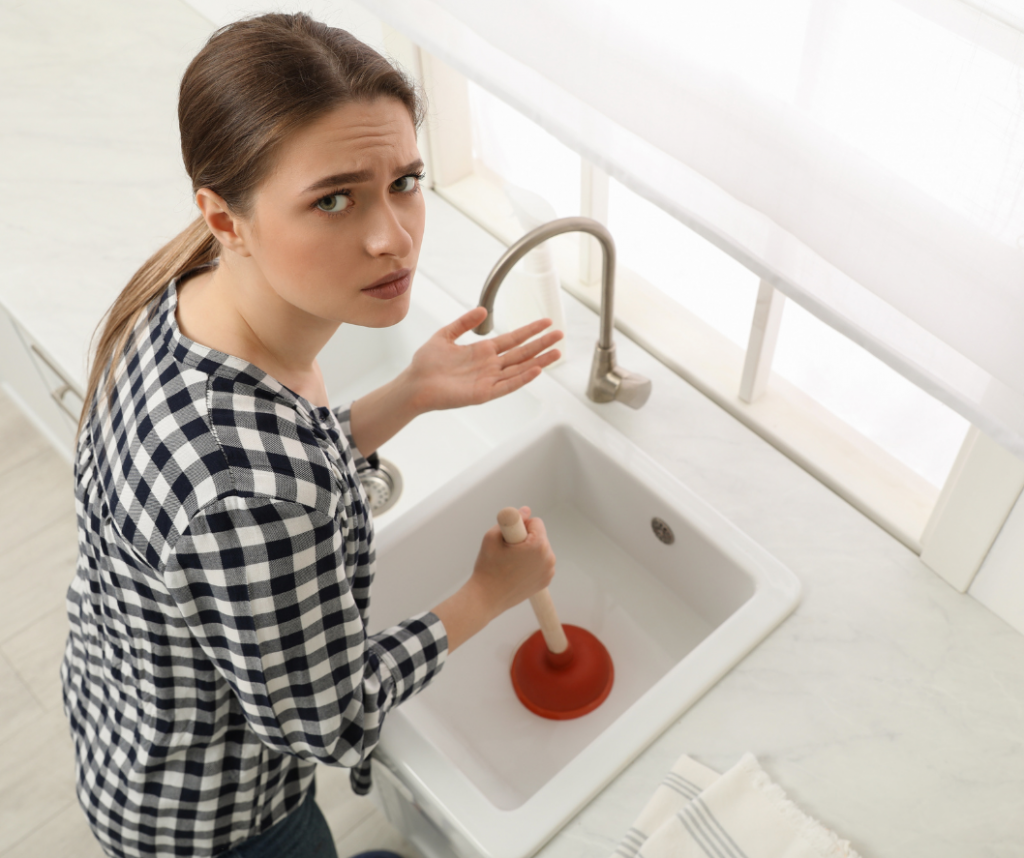
Are you tired of dealing with a clogged sink that just won’t budge? We’ve all been there. Whether it’s a slow drain or a complete blockage, a clogged sink can be incredibly frustrating. But fear not, because in this article, we’ll show you how to unclog a sink quickly and effectively.
No need to reach for harmful chemical drain cleaners or call a plumber just yet. With a few simple steps and some common household items, you can clear that stubborn clog and have your sink running smoothly again in no time.
From using a plunger to removing and cleaning the trap, we’ll walk you through multiple methods to tackle different types of sink clogs. We’ll also provide some valuable tips on preventing future clogs and maintaining a clean and odor-free sink.
Don’t let a clogged sink bring your daily routine to a halt. Read on to discover the best techniques and tricks to unclog a sink and get back to enjoying a functioning, hassle-free kitchen or bathroom sink.
Common Causes of a Clogged Sink
Before we jump into the methods to unclog a sink, it’s important to understand the common causes of sink clogs. By knowing the root of the problem, you can take preventative measures to avoid future clogs.
1. Food waste: One of the most common culprits behind kitchen sink clogs is food waste. Grease, oil, and leftover food particles can accumulate over time, causing a blockage in the pipes.
2. Hair and soap scum: In bathroom sinks, hair and soap scum are often the main causes of clogs. Hair can get tangled in the drain, while soap scum can build up and restrict water flow.
3. Foreign objects: Sometimes, small objects like jewelry, toothpaste caps, or even children’s toys can accidentally find their way into the sink drain, causing a blockage.
By being mindful of these common causes, you can take steps to minimize the risk of clogs in the future.
Tools and Materials Needed for Unclogging a Sink
Before we get started with the unclogging process, let’s gather the necessary tools and materials. You’ll be surprised to find that most of them are already lying around your house.
1. Plunger: A plunger is a versatile tool that can help dislodge clogs by creating suction and pressure. Make sure you have a plunger specifically designed for sinks, as they have a flat cup shape.
2. Plumber’s snake or auger: For more stubborn clogs, a plumber’s snake or auger can come in handy. This long, flexible tool is inserted into the drain and used to break up or retrieve the clog.
3. Bucket and towels: It’s always a good idea to have a bucket and some towels nearby to catch any water or debris that may come out during the unclogging process.
4. Baking soda and vinegar: These common household items can be used as a natural and eco-friendly alternative to chemical drain cleaners. Baking soda helps break down the clog, while vinegar creates a fizzing reaction that helps dislodge it.
Now that we have our tools and materials ready, let’s move on to the step-by-step guide on how to unclog a sink.
Step-by-Step Guide on How to Unclog a Sink
Follow these simple steps to tackle a clogged sink and restore its proper functioning:
Step 1: Remove any standing water
Before you start unclogging the sink, it’s important to remove any standing water in the sink basin. Use a cup or a bucket to scoop out the water and transfer it to a drain or a container.
Step 2: Clear the sink overflow
If your sink has an overflow opening, it’s crucial to clear it before proceeding with the unclogging process. Use a small brush or a toothbrush to remove any debris or buildup from the overflow opening.
Step 3: Use a plunger
The plunger is often the first tool you should reach for when dealing with a clogged sink. Make sure the sink is partially filled with water, enough to cover the rubber cup of the plunger. Position the plunger over the drain and vigorously plunge up and down for about a minute. This action creates suction and pressure that can dislodge the clog.
Step 4: Try a plumber’s snake or auger
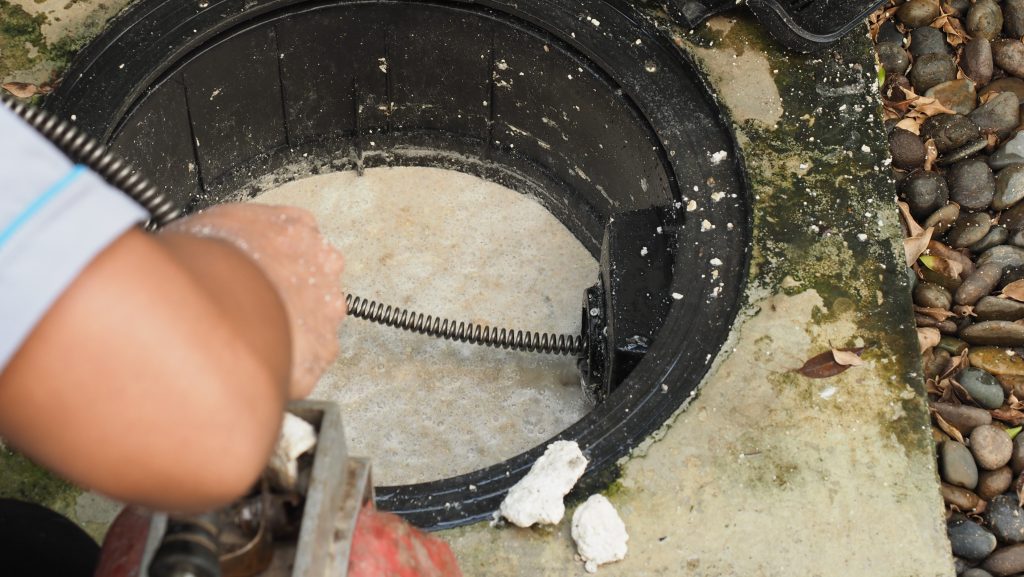
If the plunger doesn’t do the trick, it’s time to bring out the plumber’s snake or auger. Insert the snake into the drain until you feel resistance, then rotate the handle clockwise to break up the clog or retrieve it. Keep pulling and pushing the snake until you no longer feel any resistance. Rinse the drain with hot water to flush away any remaining debris.
Step 5: Use baking soda and vinegar
If you prefer a natural method, baking soda and vinegar can be highly effective in unclogging a sink. Start by pouring half a cup of baking soda down the drain, followed by half a cup of vinegar. Let the mixture sit for about 30 minutes, then flush it down with hot water. The baking soda and vinegar create a chemical reaction that can break down the clog.
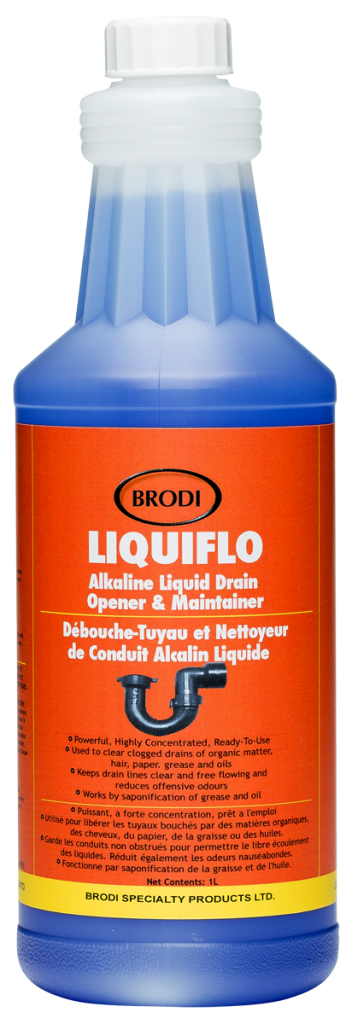
Step 7: Consider using Liquiflo Fumeless Alkaline Drain Opener
For persistent or tough clogs, you may want to consider using a specialized product like Liquiflo Fumeless Alkaline Drain Opener. This product not only helps in unclogging drains but also serves as a maintainer that kills biofilms, preventing future clogs. Follow the product instructions for optimal results.
Step 6: Clean the sink trap
In some cases, the clog may be located in the sink trap, which is the curved pipe under the sink. Place a bucket underneath the trap to catch any water or debris. Loosen the slip nuts on both ends of the trap using a pair of pliers, then remove the trap. Clean out any debris or buildup, and reattach the trap by tightening the slip nuts.
By following these step-by-step instructions, you should be able to unclog your sink and restore its normal drainage.
Natural Remedies for Unclogging a Sink
If you prefer to use natural remedies instead of chemical drain cleaners, here are a few more options to consider:
1. Salt and boiling water: Mix half a cup of salt with boiling water and pour it down the drain. The hot water helps dissolve the clog, while the abrasive nature of salt can assist in breaking it down.
2. Baking soda and lemon juice: Combine half a cup of baking soda with half a cup of lemon juice. Pour the mixture down the drain and let it sit for at least an hour. Flush it down with hot water to clear the clog.
3. Hot water and dish soap: Boil a kettle of hot water and pour it down the drain. Follow it up with a few tablespoons of dish soap. Let it sit for a few minutes, then flush it down with hot water. The combination of heat and soap can help break down the clog.
These natural remedies can be effective in certain situations, but keep in mind that they may not work for severe or stubborn clogs.
Preventing Future Sink Clogs
Now that you’ve successfully unclogged your sink, it’s important to take preventative measures to avoid future clogs. Here are some tips to keep your sink drain flowing smoothly:
1. Dispose of food waste properly: Avoid pouring grease, oil, or large food particles down the sink. Instead, scrape them off into the trash or compost bin.
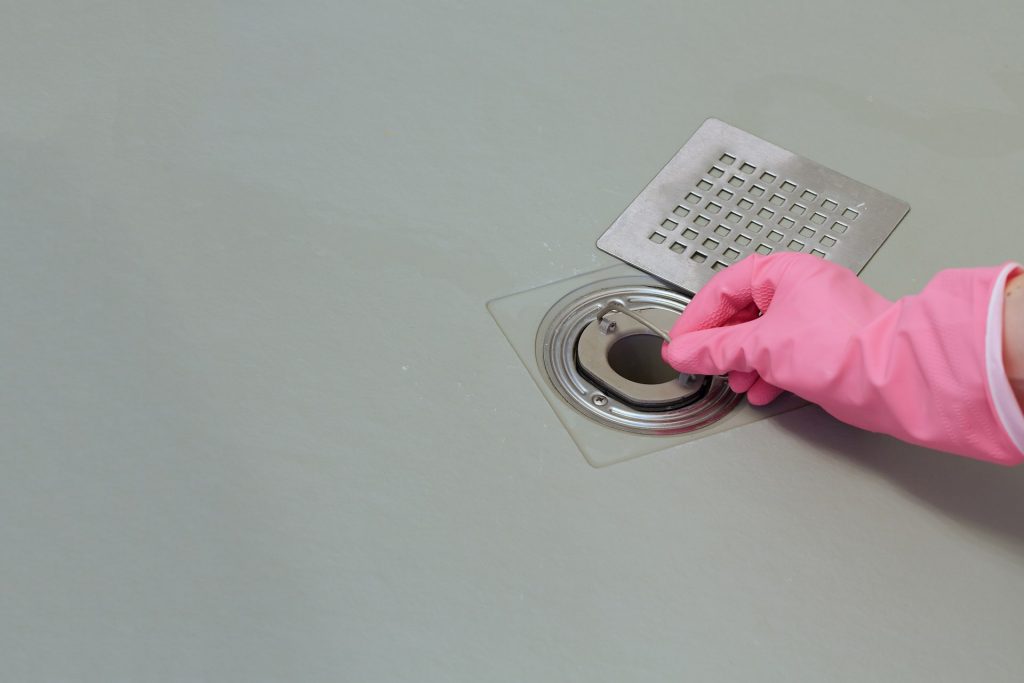
2. Install a drain strainer: A drain strainer or stopper can help catch hair, food particles, and other debris before they enter the drain. Regularly clean the strainer to prevent buildup.
3. Run hot water after each use: After using the sink, run hot water for a few minutes to flush away any remaining debris and prevent it from solidifying in the pipes. This simple practice helps maintain clear and unobstructed pipes. Additionally, incorporating a specialized product like Liquiflo Fumeless Alkaline Drain Opener & Maintainer that Kills Biofilms can further enhance the effectiveness of your routine.
4. Regularly clean the sink trap: Remove the sink trap every few months and clean out any accumulated debris or buildup. This simple maintenance task can prevent clogs caused by trapped materials.
By incorporating these preventative measures into your routine, you can significantly reduce the likelihood of experiencing future sink clogs.
When to Call a Professional Plumber
While the methods and remedies mentioned in this article can effectively unclog most sinks, there may be situations where it’s best to call a professional plumber. Here are a few instances when professional assistance may be necessary:
1. Multiple clogged drains: If multiple drains in your home are clogged at the same time, it could indicate a more significant issue with the main sewer line. In such cases, a plumber’s expertise is crucial.
2. Recurring clogs: If you find yourself dealing with frequent sink clogs despite your best efforts, there may be an underlying plumbing issue that requires professional attention.
3. Unusual odors or gurgling sounds: If you notice foul odors or gurgling sounds coming from your sink drain, it could be a sign of a more serious plumbing problem. A plumber can identify and address the root cause.
Remember, it’s always better to seek professional help if you’re unsure about the severity of the clog or if you’re not confident in your ability to resolve it on your own.
Tips for Maintaining a Clean and Clog-free Sink
To keep your sink in top condition and prevent future clogs, follow these additional tips:
1. Avoid pouring cooking oil or grease down the drain: These substances can solidify and cause clogs. Instead, let them cool and dispose of them in the trash.
2. Run hot water after using the garbage disposal: After using the garbage disposal, run hot water for a few minutes to help flush away any remaining food particles.
3. Regularly clean the garbage disposal: To eliminate odors and prevent buildup, clean your garbage disposal by grinding ice cubes or running a mixture of vinegar and baking soda through it.
4. Keep your sink clean: Regularly clean your sink with a mild detergent and warm water to prevent the accumulation of soap scum, mineral deposits, and bacteria.
By incorporating these tips into your sink maintenance routine, you can ensure a clean and clog-free sink for years to come.
Sink Unclogging Products and Their Effectiveness
If you prefer to use commercial products to unclog your sink, there are several options available. However, it’s important to note that their effectiveness can vary depending on the severity of the clog.
1. Chemical drain cleaners: These products contain powerful chemicals that can dissolve clogs. However, they can also damage pipes, harm the environment, and pose health risks if not used properly. Use them as a last resort and follow the instructions carefully.
2. Enzyme-based drain cleaners: Enzyme-based cleaners use natural bacteria and enzymes to break down organic matter. They are generally safer for pipes and the environment, but they may take longer to work and may not be effective for severe clogs.
3. Air-powered drain cleaners: These devices use compressed air to create pressure and dislodge clogs. They can be effective for minor clogs, but they may not work for more stubborn or complex clogs.
4. Fumeless Alkaline Drain Opener & Maintainer that Kills Biofilms: Consider using Liquiflo Fumeless Alkaline Drain Opener & Maintainer for an effective solution. This product is designed not only to unclog drains but also to serve as a biofilm-killing maintainer. It offers a fumeless formulation, making it a convenient and efficient option for maintaining clear and healthy pipes. Follow the product instructions for optimal results.
Before using any commercial products, make sure to read the instructions, follow safety precautions, and consider the potential risks and benefits.
Conclusion
Dealing with a clogged sink can be a frustrating experience, but with the right tools and methods, you can easily unclog it yourself. From using a plunger to removing and cleaning the trap, we’ve covered various techniques to tackle different types of sink clogs.
Remember to be mindful of what goes down your sink drain, practice regular maintenance, and take preventative measures to avoid future clogs. If all else fails, don’t hesitate to call a professional plumber for assistance.
By following the tips and techniques outlined in this article, you’ll be well-equipped to unclog your sink and restore its proper function. Say goodbye to clogged sinks and hello to hassle-free, smoothly running drains!
Frequently Asked Questions About Sink Clogs
Q: Can I use chemical drain cleaners to unclog my sink?
A: While chemical drain cleaners can be effective in some cases, they often contain harsh chemicals that can be harmful to you, your pipes, and the environment. It’s best to try natural remedies or mechanical methods first before resorting to chemical cleaners.
Q: How often should I clean my sink trap?
A: It’s a good idea to clean your sink trap every few months to prevent the buildup of debris and reduce the risk of clogs.
Q: Can I use a plunger on a double sink?
A: Yes, you can use a plunger on a double sink. However, you’ll need to block one drain with a wet cloth or a drain stopper to create a proper seal and apply pressure effectively.
Q: Why does my sink drain slowly even when it’s not fully clogged?
A: A slow-draining sink can be caused by partially clogged pipes, a buildup of soap scum or mineral deposits, or an issue with the venting system. Regular cleaning and maintenance can help prevent this problem.
Q: What should I do if none of the unclogging methods work?
A: If none of the methods mentioned in this article work, it’s best to call a professional plumber. They have the expertise and specialized tools to tackle more stubborn or complex clogs.
Are you struggling with a stubborn grease trap? Fret not, because we have got you covered with the ultimate guide to cleaning grease traps. Grease traps can easily become a messy and smelly headache if not maintained properly. But fear not, with our best practices and tips, you’ll have that grease trap sparkling clean in no time.
Cleaning grease traps is no easy task, but it is essential for the smooth running of your kitchen or restaurant. In this comprehensive guide, we will walk you through everything you need to know, from the importance of regular cleaning to the step-by-step process of cleaning your grease trap effectively.
We’ll provide you with expert tips on selecting the right cleaning products, tools, and techniques to tackle even the toughest grease buildup. You’ll also learn how to minimize odors and prevent clogs, ensuring your grease trap stays clean and odor-free for longer.
So, whether you’re a restaurant owner or a homeowner, this guide will equip you with the knowledge and skills you need to master cleaning grease traps. Say goodbye to grease and hello to a clean and functional kitchen!
Signs that your grease trap needs cleaning
Properly cleaning grease traps is crucial for several reasons. First and foremost, it helps prevent clogs in your plumbing system. When grease accumulates in the trap and solidifies, it can cause blockages that lead to backups and costly repairs. Regular cleaning ensures that the trap remains clear and allows for efficient flow.
Another important reason to clean grease traps is to prevent foul odors. Grease traps can emit unpleasant smells when they are not cleaned regularly. These odors can permeate your kitchen or restaurant, affecting the dining experience and driving away customers. By cleaning your grease trap, you can maintain a fresh and inviting environment.
Additionally, cleaning grease traps is essential for compliance with health and safety regulations. Many local authorities require businesses, especially those in the food service industry, to regularly clean and maintain their grease traps. Failure to do so can result in fines and potential closure of your establishment.
Best practices for cleaning grease traps
Knowing when to clean your grease trap is crucial to prevent issues before they escalate. Here are some common signs that indicate your grease trap needs cleaning:
1. Slow draining sinks: If you notice that your sinks are draining slowly, it could be a sign that your grease trap is clogged. As grease builds up, it restricts the flow of water, causing drainage problems.
2. Foul odors: Unpleasant smells emanating from your kitchen or restaurant are a clear indication that your grease trap needs attention. These odors are a result of the accumulation of grease and other food debris.
3. Grease buildup on surfaces: If you notice a greasy film on your sink, walls, or floors, it’s a sign that your grease trap is not functioning properly. The grease is finding its way out of the trap and causing a mess.
4. High water levels in the trap: When you inspect your grease trap, if you find that the water level is abnormally high, it indicates that the trap is full and needs cleaning. The high water level prevents the trap from effectively capturing grease and solids.
Tools and equipment needed for grease trap cleaning
Cleaning a grease trap requires careful attention to detail and adherence to best practices. Follow these guidelines to ensure effective and efficient cleaning:
Wear protective gear: Before you start cleaning, make sure to wear gloves, goggles, and protective clothing. Grease traps can contain harmful bacteria and chemicals, so it’s important to protect yourself.
Gather the necessary tools and materials: You’ll need a bucket, scraper, brush, and a grease trap cleaning solution. It’s important to use a cleaning solution specifically designed for grease traps, as household cleaners may not be effective.
Add CGTC 7150 to your cleaning arsenal: Incorporate CGTC 7150, a specialized grease trap cleaning solution, into your toolkit. CGTC 7150 is known for its powerful formula that effectively breaks down grease and ensures a thorough cleaning process. Follow the manufacturer’s instructions for the proper use of CGTC 7150.
Disconnect the trap: Start by disconnecting the grease trap from the plumbing system. This can usually be done by removing a few bolts or screws. Be sure to place a bucket underneath to catch any residual water or grease.
Remove the lid and scrape off the solidified grease: Carefully remove the grease trap lid and use a scraper to eliminate any solidified grease or debris. Be thorough in your scraping to ensure a clean trap.
Scrub the sides and bottom of the trap: Use a brush or scrubber to clean the sides and bottom of the trap. Pay special attention to areas where grease tends to accumulate. Utilize the cleaning solution, including CGTC 7150, to help break down and remove stubborn grease.
Rinse and reassemble the trap: Once you’ve thoroughly cleaned the trap, rinse it with hot water to remove any remaining residue. Reassemble the trap, ensuring all connections are secure.
Properly dispose of the grease and waste: It’s important to dispose of the grease and waste properly. Check local regulations for guidelines on disposal. Never pour grease down the drain, as it can cause clogs and environmental damage. Instead, follow approved methods for disposal by local regulations.
Step-by-step guide to cleaning a grease trap
To effectively clean a grease trap, you’ll need the following tools and equipment:
1. Gloves: Protect your hands from chemicals and bacteria with a pair of durable gloves.
2. Goggles: Safeguard your eyes from splashes and fumes by wearing protective goggles.
3. Scraper: Use a sturdy scraper to remove solidified grease and debris from the trap.
4. Brush or scrubber: A brush or scrubber with stiff bristles will help you clean the sides and bottom of the trap thoroughly.
5. Bucket: Place a bucket underneath the trap to catch any water or grease that may spill during the cleaning process.
6. Grease trap cleaning solution: Invest in a high-quality grease trap cleaning solution that is specifically designed to break down and remove grease buildup.
Tips for maintaining a clean grease trap
The frequency of cleaning your grease trap depends on various factors, including the size of your trap and the amount of grease generated. As a general guideline, it is recommended to clean your grease trap at least every three months. However, high-volume kitchens or restaurants may require more frequent cleaning, such as monthly or even weekly.
Regular inspection is key to determining when your grease trap needs cleaning. Look for signs of grease buildup, slow drainage, foul odors, or high water levels. If you notice any of these signs, it’s time to clean your grease trap.
Professional grease trap cleaning services
While regular maintenance and cleaning are essential, sometimes it’s best to leave the job to the professionals. Hiring a professional grease trap cleaning service can save you time, and effort, and ensure a thorough cleaning. These experts have the knowledge, experience, and equipment to handle even the toughest grease trap situations.
To ensure your grease trap stays clean and functional for longer, consider implementing these tips:
1. Implement a regular maintenance schedule: Create a schedule for cleaning your grease trap and stick to it. Regular cleaning prevents excessive grease buildup and keeps your trap operating smoothly.
2. Use eco-friendly cleaning products: Consider using eco-friendly and biodegradable cleaning products that are safe for the environment. This helps minimize the impact of your cleaning activities.
3. Train your staff: Educate your kitchen staff on the importance of proper waste disposal and grease trap maintenance. Encourage them to scrape food scraps into trash bins rather than washing them down the drain.
4. Install a grease trap alarm: Consider installing a grease trap alarm that alerts you when the trap is approaching its maximum capacity. This ensures timely cleaning and prevents overflow.
5. Regularly inspect and clean drain screens: Drain screens can catch solid debris and prevent them from entering the grease trap. Clean them regularly to maintain efficient flow and reduce the risk of clogs.
When choosing a professional service, make sure they are licensed, insured, and have a good reputation. Read reviews and ask for recommendations from other restaurant owners or homeowners who have used their services. A professional cleaning service will keep your grease trap in top shape, allowing you to focus on running your business or enjoying your home.
Conclusion
In conclusion, conquering the challenges posed by a stubborn grease trap is within your reach with our comprehensive guide to cleaning and maintaining these essential kitchen components. Grease traps, when neglected, can transform into messy and odorous headaches, leading to plumbing issues and potential business disruptions. However, armed with our expert advice and best practices, you’ll transform your grease trap from a source of concern to a sparkling, efficiently functioning asset in no time.
We’ve covered everything from the critical signs indicating the need for cleaning, the importance of regular maintenance to prevent clogs and foul odors, to a step-by-step guide on how to effectively clean your grease trap. Remember, a clean grease trap not only ensures a smooth kitchen operation but also contributes to a fresh and inviting environment for your customers.
Our tips on selecting the right cleaning products, tools, and techniques, including the powerful CGTC 7150 solution, will equip both restaurant owners and homeowners with the knowledge and skills needed to master grease trap cleaning. We’ve emphasized the importance of proper disposal methods to adhere to environmental regulations and maintain a responsible cleaning routine.
For those who prefer a hands-off approach or require a more thorough cleaning, we’ve introduced the option of professional grease trap cleaning services. These experts possess the knowledge, experience, and equipment to tackle even the toughest grease trap situations, providing you with peace of mind.
In the journey toward a clean and functional kitchen, implementing our tips for maintaining a clean grease trap becomes crucial. From eco-friendly cleaning products to regular staff training and the installation of grease trap alarms, these practices contribute to a sustained, efficient grease trap operation.
So, whether you’re a seasoned restaurant owner or a diligent homeowner, follow our guide, implement the suggested practices, and bid farewell to grease-related woes. Say goodbye to clogs, foul odors, and potential regulatory issues. Embrace a clean and functional kitchen that enhances both the operational efficiency of your business and the comfort of your home. Here’s to a grease-free future!
Are you tired of snow sticking to your snow removal equipment and slowing you down? If so, it’s time to consider the benefits of wax coating for enhancing your equipment’s performance. Wax coating, a popular choice among professionals, not only makes your tools look sleek and professional but also improves their functionality in snowy conditions.
When applied to your snow shovels, plows, or blowers, wax coating forms a protective layer that helps prevent snow from sticking to the surface. This means you can remove snow more efficiently, saving time and effort. Additionally, the slick surface created by wax coating allows the equipment to glide smoothly over the snow, reducing resistance and making the whole process easier.
Not only does wax coating enhance your snow removal equipment’s performance, but it also helps extend its lifespan. By protecting your tools from rust and corrosion, the coating ensures they remain in top condition, capable of tackling even the harshest winter weather.
Investing in wax coating for your snow removal equipment can make a significant difference in your snow removal efficiency and the overall maintenance of your tools. So why wait? Get your equipment coated today and experience the benefits for yourself.
Advantages of Wax Coating for Snow Removal Equipment
Snow removal can be a challenging task, especially when the snow sticks to your equipment, making it difficult to clear the way effectively. This is where wax coating comes in handy. When applied to your snow shovels, plows, or blowers, wax coating forms a protective layer that helps prevent snow from sticking to the surface.
The primary advantage of wax coating is that it allows you to remove snow more efficiently, saving time and effort. The slippery nature of the wax coating ensures that the snow slides off easily, without getting clogged on the surface of your equipment. This means you can clear larger areas in a shorter amount of time, increasing your overall productivity.
Additionally, the slick surface created by wax coating allows the equipment to glide smoothly over the snow, reducing resistance and making the whole process easier. You’ll experience less strain on your arms and back, resulting in a more comfortable snow removal experience.
How Wax Coating Enhances Performance and Durability
Not only does wax coating enhance your snow removal equipment’s performance, but it also helps extend its lifespan. By protecting your tools from rust and corrosion, the coating ensures they remain in top condition, capable of tackling even the harshest winter weather.
Snow and ice can cause damage to your equipment, leading to costly repairs or replacements. Wax coating acts as a barrier, preventing moisture from seeping into the metal components and causing rust. The coating also protects against salt and other corrosive substances commonly used in winter road maintenance.
Moreover, wax coating provides a layer of insulation, reducing the risk of freezing and further damage to your snow removal equipment. This added protection ensures that your tools remain reliable and effective throughout the winter season, saving you money in the long run.
Protection Against Corrosion and Rust With Wax Coating
One of the biggest concerns when it comes to snow removal equipment is the potential for corrosion and rust. Winter weather conditions, combined with exposure to moisture and salt, can quickly deteriorate the metal components of your tools. However, with the application of wax coating, you can significantly reduce the risk of corrosion and rust.
Wax coating forms a protective barrier on the surface of your equipment, preventing moisture from coming into direct contact with the metal. This barrier inhibits the oxidation process that leads to rust formation. By keeping your snow removal equipment rust-free, you can ensure its optimal performance and longevity.
Furthermore, wax coating also protects against the corrosive effects of salt and other de-icing chemicals. These substances can cause significant damage to your tools if left untreated. The wax coating acts as a shield, preventing the salt from penetrating the metal and causing corrosion.
Increased Efficiency and Reduced Maintenance With Wax Coating
Snow removal can be a time-consuming and physically demanding task. However, with wax coating, you can significantly increase your efficiency and reduce the effort required to clear snow.
The slick surface created by wax coating allows your equipment to glide smoothly over the snow, minimizing resistance. This means you can clear snow more quickly and effortlessly, resulting in improved productivity.
Additionally, the reduced friction provided by wax coating helps prevent snow from sticking to the surface of your tools. This means you won’t have to constantly stop and clean off the snow, saving you valuable time during the snow removal process.
Moreover, the wax coating reduces the buildup of ice on your equipment, further enhancing its efficiency. The slippery surface prevents ice from forming and accumulating, allowing you to continue working without interruption.
With wax coating, you’ll also experience reduced maintenance requirements for your snow removal equipment. The protective layer provided by the coating helps repel dirt, debris, and other contaminants, keeping your tools cleaner for longer. This means less time spent on regular cleaning and maintenance, allowing you to focus on the task at hand.
Longevity and Cost-Effectiveness of Wax Coating
Investing in wax coating for your snow removal equipment can make a significant difference in its longevity and overall cost-effectiveness. By protecting your tools from rust and corrosion, the coating ensures they remain in top condition, capable of tackling even the harshest winter weather.
Snow removal equipment is a significant investment, and it’s essential to maximize its lifespan. Wax coating acts as a barrier, preventing moisture and corrosive substances from damaging the metal components. This added protection extends the life of your tools, reducing the need for frequent repairs or replacements.
Moreover, the cost-effectiveness of wax coating lies in its ability to enhance the efficiency of your snow removal equipment. By reducing resistance and preventing snow from sticking, you can clear larger areas in less time, ultimately saving on labor costs.
Additionally, the reduced maintenance requirements for wax-coated equipment result in further cost savings. With less time spent on cleaning and upkeep, you can allocate resources to other areas of your snow removal operation.
Steps to Apply Wax Coating to Snow Removal Equipment
Applying wax coating to your snow removal equipment is a straightforward process that can yield significant benefits. Here are the basic steps to follow:
1. Clean the equipment: Before applying wax coating, ensure that your tools are clean and free from dirt, debris, and rust. Use a mild detergent and water to thoroughly clean the surfaces, and allow them to dry completely.
2. Choose the right wax coating: There are various types of wax coatings available, each designed for specific materials and applications. Consider the type of snow removal equipment you have and select a wax coating that is suitable for its surface.
3. Apply the wax coating: Follow the manufacturer’s instructions for applying the wax coating. Generally, this involves using a sponge or cloth to evenly spread the wax over the surfaces of your equipment. Allow the coating to dry completely before using the tools.
4. Maintain the wax coating: To ensure the longevity of the wax coating, it’s essential to regularly inspect and maintain your snow removal equipment. Check for any signs of wear or damage to the coating, and reapply as necessary.
Types of Wax Coatings for Different Snow Removal Equipment
There are various types of wax coatings available, each designed to suit different types of snow removal equipment. Here are some common types of wax coatings:
1. Carnauba wax: Carnauba wax is a natural wax derived from the leaves of the carnauba palm tree. It is known for its durability and high melting point, making it suitable for heavy-duty snow removal equipment.
2. Polymer-based wax: Polymer-based wax coatings provide excellent protection against rust and corrosion. They are often used for smaller snow removal tools, such as shovels and blowers.
3. Silicone wax: An exclusive fusion of silicone and wax coating creates a smooth, non-adhesive layer, effectively warding off the adherence of ice and snow to plows, shovels, and other snow removal equipment.
4. Synthetic wax: Synthetic waxes are formulated to offer long-lasting protection and enhanced performance. They are ideal for larger snow removal equipment, such as plows and snow blowers.
5. Clearcoat wax: Clearcoat wax is a transparent wax coating that provides a glossy finish while protecting your equipment from the elements. It can be used on various types of snow removal tools.
When selecting a wax coating for your snow removal equipment, consider the specific requirements of your tools and the type of snow conditions you typically encounter. Consult with a professional or the manufacturer of the wax coating for expert advice.
Maintenance Tips for Snow Removal Equipment with Wax Coating
To ensure the longevity and optimal performance of your snow removal equipment with wax coating, it’s essential to follow proper maintenance practices. Here are some tips to keep in mind:
1. Regularly inspect your equipment for any signs of wear or damage to the wax coating. If you notice any areas where the coating has worn off, reapply the wax to ensure continued protection.
2. After each use, clean your equipment thoroughly to remove any dirt, debris, or salt residue that may have accumulated. Use a mild detergent and water to clean the surfaces, and dry them thoroughly to prevent moisture buildup.
3. Avoid exposing your wax-coated equipment to extreme temperatures or harsh weather conditions when not in use. Store your tools in a dry and protected environment to prevent damage to the wax coating.
4. If you notice any signs of rust or corrosion on your equipment, take immediate action to address the issue. Use a rust remover or a wire brush to remove any rust spots, and reapply the wax coating to protect against further damage.
By following these maintenance tips, you can ensure that your snow removal equipment remains in top condition, providing reliable performance throughout the winter season.
As a responsible car owner, keeping your vehicle in top-notch condition should be a top priority. One important aspect of car maintenance that often gets overlooked is auto undercoating. This ultimate guide will shed light on why auto undercoating is essential and why every car owner should consider it.
Auto undercoating serves as a protective layer between your car’s body and the road. It shields your vehicle from various elements such as moisture, salt, gravel, and other debris that can cause rust and corrosion. By preventing these damaging elements from reaching the vulnerable areas of your car, undercoating can significantly extend the life of your vehicle.
Not only does undercoating protect against corrosion, but it also helps reduce road noise and vibrations, making for a smoother and quieter ride. Additionally, it can act as an added layer of insulation, helping to keep your car’s interior cooler during the hot summer months and warmer during the winter.
In this comprehensive guide, we will explore the different types of undercoating, the benefits they offer, and the best practices for applying undercoating to your car. Don’t neglect this important step in car maintenance. Read on to discover why auto undercoating is essential for every car owner.
The Importance of Auto Undercoating
Auto undercoating refers to the process of applying a protective coating to the underside of a car. It involves spraying a layer of specialized material onto the exposed metal surfaces, such as the chassis, floor pans, and wheel wells. This coating acts as a barrier that prevents moisture, salt, and other corrosive substances from coming into direct contact with the metal, reducing the risk of rust and corrosion.
Undercoating can be done using various materials, including rubberized coatings, asphalt-based coatings, and wax-based coatings. The choice of undercoating material depends on factors such as the climate in which you live, the type of driving you do, and personal preference.
Benefits of Auto Undercoating
Auto undercoating is crucial for maintaining the structural integrity and longevity of your car. The underside of a vehicle is constantly exposed to harsh elements, such as road salt, gravel, and moisture. Over time, these elements can cause corrosion, leading to rust and deterioration of the metal components.
By applying an undercoating, you create a protective barrier that prevents these elements from reaching the vulnerable areas of your car. This significantly reduces the risk of rust and corrosion, prolonging the lifespan of your vehicle.
Furthermore, undercoating helps to reduce road noise and vibrations. The coating acts as a sound-dampening barrier, absorbing the noise generated by the tires and the road surface. This results in a quieter and more comfortable ride, especially on rough roads or highways.
Additionally, undercoating can provide insulation benefits. It helps to keep your car’s interior cooler during hot summer months by reflecting heat away from the underside of the vehicle. In colder climates, undercoating acts as an added layer of insulation, helping to retain heat and keep the interior warmer.
1. Corrosion Prevention with Proflex: One of the key advantages of utilizing auto undercoating, particularly with products like Proflex, is its effective corrosion protection. By establishing a protective barrier that shields the vehicle’s metal surfaces from corrosive elements, Proflex undercoating markedly diminishes the likelihood of rust and deterioration.
2. Extended lifespan: With proper undercoating, you can significantly extend the lifespan of your vehicle. By preventing rust and corrosion, you ensure that the structural integrity of your car remains intact, allowing it to withstand the test of time.
3. Reduced maintenance costs: Rust and corrosion can lead to costly repairs and replacements. By investing in undercoating, you can minimize the need for expensive repairs, saving you money in the long run.
4. Improved resale value: A well-maintained car with a solid undercoating can fetch a higher resale value. Prospective buyers will appreciate the added protection against rust and corrosion, making your vehicle more desirable in the used car market.
5. Enhanced driving experience: Undercoating helps to reduce road noise and vibrations, resulting in a smoother and quieter ride. This can make your driving experience more enjoyable, especially on long trips or rough roads.
Common Misconceptions about Auto Undercoating
1. New cars don’t need undercoating: While new cars often come with some form of factory undercoating, it may not provide sufficient protection in certain climates or driving conditions. Adding an additional layer of undercoating can provide extra protection and peace of mind.
2. Undercoating is only for off-road vehicles: Undercoating is beneficial for all types of vehicles, not just off-road ones. Any car exposed to harsh elements can benefit from the added protection against rust and corrosion.
3. Undercoating is a one-time treatment: Undercoating is not a one-time treatment. Over time, the undercoating can wear off, especially in regions with extreme weather conditions or where road salt is used. Regular inspections and reapplication may be necessary to maintain the protective barrier.
4. Undercoating is expensive: The cost of undercoating varies depending on the type of material used and whether you choose to do it yourself or hire a professional. However, the cost of undercoating is minimal compared to potential repair costs caused by rust and corrosion.
5. Undercoating is only for older cars: While older cars are more prone to rust and corrosion, undercoating is beneficial for both new and old vehicles. It helps protect against the damaging effects of moisture, salt, and other corrosive substances, regardless of the age of the car.
Types of Undercoating Materials
1. Rubberized coatings: Rubberized undercoatings are popular due to their durability and flexibility. They provide excellent protection against moisture, salt, and debris. Rubberized coatings also offer sound-dampening properties, reducing road noise.
2. Asphalt-based coatings: Asphalt-based undercoatings are known for their excellent rust and corrosion resistance. They provide a thick, protective layer that adheres well to the metal surfaces. However, asphalt-based coatings can be more challenging to apply and may require professional assistance.
3. Wax-based coatings: Wax-based undercoatings offer a more affordable option and are relatively easy to apply. They provide a protective barrier against moisture and salt. However, wax-based coatings may not be as durable as rubberized or asphalt-based options and may require more frequent reapplication.
Steps to Undercoat Your Car
1. Prepare the vehicle: Thoroughly clean the underside of your car to remove any dirt, debris, or rust. It is crucial to start with a clean surface to ensure proper adhesion of the undercoating material.
2. Choose the undercoating material: Select the type of undercoating material that best suits your needs and climate. Consider factors such as durability, sound-dampening properties, and ease of application.
3. Apply the undercoating: Follow the manufacturer’s instructions for applying the chosen undercoating material. Use a spray gun or brush to apply an even layer to the exposed metal surfaces. Pay close attention to areas prone to rust, such as the wheel wells and chassis.
4. Allow the undercoating to dry: Give the undercoating sufficient time to dry and cure before driving the vehicle. This ensures proper adhesion and effectiveness of the protective barrier.
5. Inspect and maintain: Regularly inspect the undercoating for any signs of wear or damage. Touch up or reapply the undercoating as necessary to maintain its protective properties.
When to Undercoat Your Car
The best time to undercoat your car is before the onset of harsh weather conditions, such as winter or rainy seasons. Applying undercoating in advance ensures that your vehicle is well-protected before it faces the elements. However, undercoating can be done at any time, even on older vehicles, to provide an added layer of protection against rust and corrosion.
How to Choose the Right Undercoating Service
The best time to undercoat your car is before the onset of harsh weather conditions, such as winter or rainy seasons. Applying undercoating in advance ensures that your vehicle is well-protected before it faces the elements. However, undercoating can be done at any time, even on older vehicles, to provide an added layer of protection against rust and corrosion.
DIY vs Professional Undercoating
If you prefer to leave undercoating to the professionals, choosing the right undercoating service is crucial. Consider the following factors when selecting a service provider:
1. Experience and reputation: Look for a service provider with a proven track record and positive reviews from satisfied customers. Experience in undercoating different types of vehicles and knowledge of various undercoating materials are essential.
2. Quality of materials: Ensure that the service provider uses high-quality undercoating materials that offer long-lasting protection against rust and corrosion. Ask about the specific products they use and their effectiveness.
3. Application process: Inquire about the application process used by the service provider. The application should be thorough, covering all exposed metal surfaces, including hard-to-reach areas.
4. Warranty and guarantees: Check if the service provider offers any warranties or guarantees on their undercoating work. A reputable provider should stand behind their work and offer assurance that the undercoating will provide the intended protection.
Deciding between a DIY undercoating or hiring a professional service depends on various factors, such as your level of expertise, available time, and budget. Here are some considerations:
DIY undercoating:
– Pros: Cost-effective, allows customization, can be done at your convenience.
– Cons: Requires proper knowledge and skills, may not provide the same level of protection as professional application, time-consuming.
Professional undercoating:
– Pros: Expert application, use of specialized equipment, provides peace of mind, saves time.
Consider your abilities, resources, and priorities when deciding which approach is best for you.
Conclusion
Auto undercoating emerges as a crucial investment for every car owner. Safeguard your vehicle against corrosion, enhance its longevity, and ensure a smoother ride for years to come. With our ultimate guide, you’re equipped to make informed decisions that protect your automotive investment. Embrace the power of undercoating, and let your car journey withstand the test of time.
Have you ever noticed a foul smell coming from your kitchen sink? If so, you are not alone. Many people struggle with smelly drains that can ruin the ambiance of their kitchen and make cooking and cleaning unpleasant. A smelly drain can also pose health risks, as it can attract pests, spread germs, and cause allergies or infections. Therefore, it is important to address the issue as soon as possible and prevent it from recurring.
In this blog, we will help you understand the causes of a smelly drain and provide you with some effective solutions to get rid of it. We will also share some preventive measures to keep your kitchen sink fresh and inviting. By following these tips, you can enjoy a clean and odor-free kitchen that will make your life easier and happier.
Understanding the Causes of a Smelly Drain in Kitchen Sink
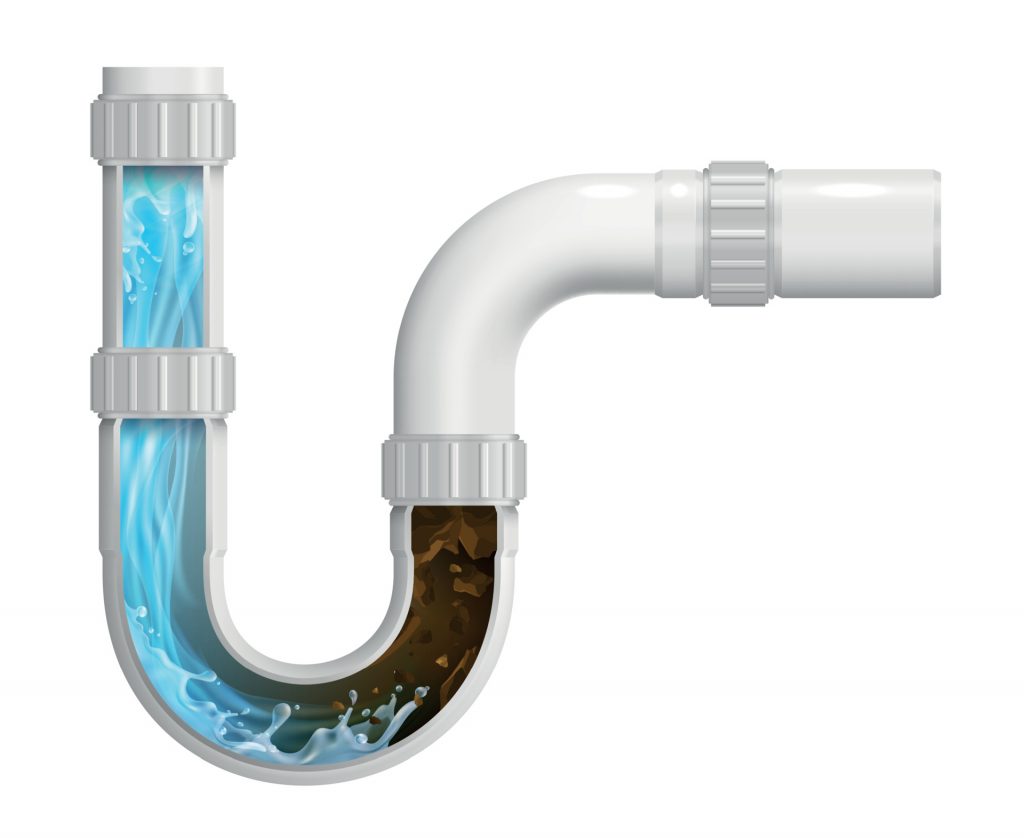
A smelly drain is not only a nuisance, but also a potential health hazard. A smelly drain can indicate that there is something wrong with your plumbing system, such as a clog, a leak, or a sewer backup. These problems can lead to water damage, mold growth, and structural issues in your home. They can also cause wastewater to overflow into your sink, contaminating your dishes, utensils, and food. This can expose you and your family to harmful bacteria, viruses, parasites, and chemicals that can cause diseases such as diarrhea, typhoid, hepatitis, and cholera.
Moreover, a smelly drain can affect your mood and well-being. A smelly drain can create a foul and unpleasant atmosphere in your kitchen, which can make you feel disgusted, stressed, or depressed. A smelly drain can also interfere with your sense of smell and taste, affecting your appetite and enjoyment of food. A smelly drain can also lower your self-esteem and confidence, as it can make you feel embarrassed or ashamed of your home. A smelly drain can also deter your guests from visiting your home, affecting your social life and relationships.
Therefore, it is important to address the issue of a smelly drain as soon as you notice it and prevent it from worsening. By doing so, you can protect your health, your home, and your happiness.
There are several possible causes of a smelly drain in your kitchen sink, such as:
Accumulated Food Residue:
Leftover food particles can accumulate in the drain and cause foul smells.
Grease and Fat Buildup:
The kitchen sink is often a landing spot for greasy dishes. Over time, grease and fat deposits can accumulate in the drain, creating a breeding ground for bacteria and contributing to foul smells.
Bacterial Growth:
The damp and dark environment inside the drain is an ideal breeding ground for bacteria. The decomposition of organic matter in the drain can lead to the production of sulfurous compounds, causing the characteristic foul odor.
Step-by-Step Solutions for a Fresh-Smelling Kitchen Sink
Now that you know the causes of a smelly drain, let’s look at some of the solutions to get rid of it. Here are some of the methods that you can try at home using simple and natural ingredients that you may already have in your kitchen.
Hot Water Flush and Baking Soda-Vinegar Treatment
One of the simplest and most effective ways to get rid of a smelly drain in the kitchen sink is to use a combination of hot water, baking soda, and vinegar. This method can help remove grease, food particles, and bacteria that cause bad odors in your drain. Here is the proper procedure to follow:
• Boil a large pot of water and pour it down the drain. This can help loosen and flush away any clogs or debris in the pipe.
• Sprinkle half a cup of baking soda into the drain and let it sit for a few minutes. Baking soda is a natural deodorizer that can absorb and neutralize odors.
• Pour one cup of white vinegar into the drain and cover it with a drain plug or a wet cloth. Vinegar is a natural acid that can react with baking soda and create a fizzing action that can dislodge and dissolve any remaining gunk in the drain.
• Wait for 15 to 20 minutes and then pour another pot of boiling water down the drain. This can help rinse and clear the drain of any residue or bubbles.
You can repeat this treatment once a month or as needed to keep your drain fresh and clean. However, if you have a garbage disposal in your sink, you may want to avoid using vinegar as it can corrode the metal parts over time. Instead, you can use lemon juice or citric acid as a substitute.
Duration and Frequency
This treatment can take about 30 to 40 minutes to complete, depending on how much water you need to boil and how long you wait for the reaction to take place. You can do this treatment once a month or as needed, depending on how often you use your sink and how smelly your drain is. You can also do this treatment as a preventive measure to prevent odors from building up in your drain.
Citrus Power
Another way to get rid of the smelly drain in your kitchen sink is to use the power of citrus fruits, such as lemons, oranges, grapefruits, or limes. Citrus fruits contain citric acid, which can help break down grease and fat in your pipe. They also contain natural oils, which can help freshen up your drain with a pleasant and refreshing scent. Here are some effective ways to use citrus fruits for your drain:
• Cut a lemon or an orange in half and squeeze the juice into the drain. You can also rub the peel on the drain opening to release the oils. This can help clean and deodorize your drain with a citrusy smell.
• Cut a grapefruit or a lime in half and sprinkle some salt on the flesh. Then, rub the salted fruit on the drain opening and inside the pipe. This can help scrub and disinfect your drain with a tangy smell.
• Peel and chop some citrus fruits of your choice and put them in a blender. Add some water and blend until smooth. Then, pour the mixture into the drain and let it sit for a few minutes. This can help flush and sanitize your drain with a fruity smell.
You can use any citrus fruit that you like or have available for this method. You can also mix and match different fruits to create your own custom scent for your drain.
Deep Cleaning with Turbo Foam:
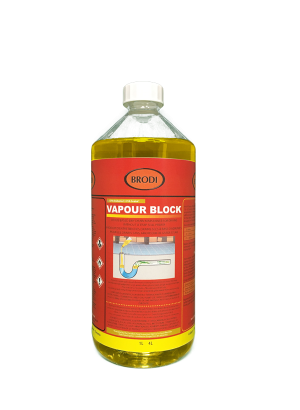
An easier method to get rid of the smelly drain in your kitchen sink is to use turbo foam, which is a foaming drain maintainer that can help dissolve and remove grease, fat, and food residue from your pipe. Turbo foam can also help eliminate bacteria and odors from your drain and prevent clogs and backups. Here is how to use turbo foam for your drain:
• Shake the can well before use and remove the cap. Attach the nozzle to the can and insert it into the drain opening. Make sure the nozzle is firmly in place and pointing down the drain.
Turbo Foam
• Press the button and release a generous amount of foam into the drain. The foam will expand and fill the pipe, reaching and cleaning the hard-to-reach areas. You will hear a hissing sound as the foam works its way down the drain.
• Wait for 15 to 20 minutes and then flush the drain with hot water. The foam will dissolve and wash away any grease, fat, food, and bacteria from the pipe, leaving it clean and odor-free.
You can use turbo foam once a week or as needed to keep your drain in good condition. You can also use turbo foam as a preventive measure to prevent grease and fat buildup in your drain.
Targeting Stubborn Debris
You can use turbo foam to target any stubborn debris that is causing your drain to smell. You can also use turbo foam to prevent any future problems with your drain, such as clogs, backups, or overflows.
Turbo foam is safe and effective for all types of pipes, including plastic, metal, and ceramic. Turbo foam is also eco-friendly and biodegradable, as it does not contain any harsh chemicals or solvents that can damage your pipes or harm the environment. You can learn more about turbo foam and other Brodi products by checking out the rest of our website.
Regular Maintenance with Baking Soda
Another method to get rid of smelly drain in the kitchen sink is to use baking soda as a regular maintenance product. Baking soda is a natural and inexpensive ingredient that can help keep your drain clean and odor-free. Here is how to establish a routine with baking soda for your drain:
• Every night before you go to bed, sprinkle a quarter cup of baking soda into the drain and let it sit overnight. This can help absorb and neutralize any odors that may develop in your pipe.
• Every morning when you wake up, run some hot water down the drain to flush the baking soda and any dirt or debris that it may have collected.
• Once a week, add some vinegar to the baking soda and let it fizz for a few minutes. This can help enhance the cleaning and deodorizing effect of the baking soda and remove any stubborn gunk from the pipe.
You can use this routine with baking soda to keep your drain in good shape and prevent any smelly problems from occurring. You can also adjust the amount and frequency of baking soda and vinegar according to your needs and preferences.
Check and Repair Leaks
Another method to get rid of smelly drain in your kitchen sink is to check and repair any leaks that may be present in your plumbing system. Leaks can cause water to seep out of your pipe and into your walls, floors, or cabinets, creating a moist and dark environment that can foster bacterial and mold growth. Leaks can also cause sewer gas to leak out of your pipe and into your kitchen, creating a foul and toxic smell that can harm your health and well-being. Here is how to check and repair leaks for your drain:
• Inspect your pipe and fittings for any signs of leaks, such as cracks, holes, rust, corrosion, or moisture. You can also use a flashlight or a mirror to look for any hidden or hard-to-see leaks in your pipe.
• If you find any leaks, mark them with a tape or a marker and turn off the water supply to your sink. You may need to use a wrench or a plier to loosen or tighten any nuts or bolts that may be causing the leaks.
• Depending on the type and severity of the leaks, you may need to use different methods to repair them, such as:
• Applying plumber’s tape, epoxy, or sealant to the leaky area and letting it dry. This can help seal and waterproof the leaky area and prevent water or gas from escaping.
• Replacing the leaky pipe or fitting with a new one that is compatible and suitable for your plumbing system. This can help restore and improve the function and performance of your pipe and prevent further leaks or damage.
• Calling a professional plumber to fix the leak for you. This can help ensure a safe and proper repair of the leak and prevent any complications or risks that may arise from a DIY repair.
You can check and repair leaks for your drain as soon as you notice them or as part of a regular maintenance schedule. You can also prevent leaks from occurring by using quality pipes and fittings and avoiding any excessive pressure or force on your pipe.
Importance of Leak Inspection
Checking and repairing leaks for your drain can have many benefits, such as:
• It can help prevent water damage and mold growth in your home, as it can stop water from seeping out of your pipe and into your walls, floors, or cabinets, creating a moist and dark environment that can foster bacterial and mold growth.
• It can help prevent sewer gas exposure and odor in your kitchen, as it can stop sewer gas from leaking out of your pipe and into your kitchen, creating a foul and toxic smell that can harm your health and well-being.
• It can help prevent water waste and high water bills, as it can stop water from dripping or flowing out of your pipe and into your drain, wasting water and increasing your water consumption and cost.
• It can help prevent plumbing problems and emergencies, as it can stop leaks from worsening or spreading and causing more damage or disruption to your plumbing system and your home.
Checking and repairing leaks for your drain can help you protect your health, your home, and your happiness.
Prompt Repair Strategies
When you find a leak in your drain, you should repair it as soon as possible to prevent it from worsening or causing more problems. Here are some prompt repair strategies that you can use:
• If the leak is small and minor, you can try to fix it yourself using plumber’s tape, epoxy, or sealant, as mentioned above. This can help you save time and money and avoid calling a plumber.
• If the leak is large and major, you should call a professional plumber to fix it for you, as mentioned above. This can help you ensure a safe and proper repair and avoid any complications or risks that may arise from a DIY repair.
• If the leak is urgent and dangerous, you should call an emergency plumber to fix it for you as soon as possible. This can help you prevent any serious damage or harm that may result from the leak, such as flooding, fire, or explosion.
You should repair a leak in your drain promptly to prevent it from worsening or causing more problems. You should also follow the instructions and precautions that come with the repair products or services that you use to ensure a successful and safe repair.
Conclusion
In this blog, we have learned how to get rid of the smelly drain in your kitchen sink using some simple and natural methods. We have also learned how to prevent smelly drains from occurring in the first place by following some preventive measures. Here is a recap of the key strategies that we have discussed:
• Use a combination of hot water, baking soda, and vinegar to remove grease, food particles, and bacteria from your drain and eliminate odors.
• Use citrus fruits, such as lemons, oranges, grapefruits, or limes, to break down grease and fat in your pipe and freshen up your drain with a pleasant and refreshing scent.
• Use Turbo Foam, which is a foaming drain maintainer, to dissolve and remove grease, fat, and food residue from your pipe and prevent clogs and backups.
• Use baking soda as a regular maintenance product to keep your drain clean and odor-free by absorbing and neutralizing any odors that may develop in your pipe.
• Check and repair any leaks that may be present in your plumbing system, as they can cause water damage, mold growth, sewer gas exposure, and odor in your kitchen.
By following these tips, you can maintain a fresh and inviting kitchen sink that will make your cooking and cleaning experience more enjoyable and satisfying. You can also protect your health, your home, and your happiness from the negative impacts of a smelly drain. We hope you found this blog helpful and informative. If you have any questions or comments, feel free to leave them below. Thank you for reading and have a great day!
Unpleasant odors wafting from floor drains can be a persistent issue in both residential and commercial spaces. The stench not only creates an uncomfortable environment but may also indicate underlying problems with drainage systems. In this comprehensive guide, we’ll explore effective strategies to keep your floor drains odor-free, ensuring a fresh and hygienic atmosphere.
Importance of Floor Drain Maintenance
Maintaining a clean and functional environment is essential for both residential and commercial spaces. One often overlooked yet critical aspect of this upkeep is floor drain maintenance. Floor drains play a pivotal role in preventing water accumulation, facilitating proper drainage, and averting potential hazards. Neglecting their care, however, can lead to a myriad of issues, with drain odors being a primary concern.
Understanding the Causes of Drain Odors
Unpleasant drain odors are often the result of accumulated debris, grease, soap scum, and other organic matter within the pipes. Over time, these substances can create a breeding ground for bacteria and fungi, leading to foul smells emanating from the drains. Additionally, stagnant water in the trap can evaporate, allowing sewer gasses to escape into the living or working space.
Regular floor drain maintenance is essential to prevent these issues. Simple tasks like removing debris, flushing drains with hot water, and using environmentally friendly cleaning solutions can go a long way in keeping the drains clear and odor-free. Timely maintenance not only ensures a pleasant environment but also prevents the potential health hazards associated with neglect.
The Health and Safety Implications of Neglecting Floor Drain Maintenance
1. Bacterial Growth:
Stagnant water and organic matter in neglected drains create an ideal environment for the growth of harmful bacteria. These bacteria can pose serious health risks, leading to infections and respiratory issues when they enter the air through drain odors.
2. Mold and Fungi:
Moisture and debris in drains contribute to the growth of mold and fungi. The release of mold spores into the air can trigger allergies and respiratory problems, affecting the well-being of occupants, especially those with pre-existing respiratory conditions.
3. Insect Infestations:
Standing water and organic material in drains attract insects such as flies and mosquitoes. These pests not only contribute to unsanitary conditions but can also carry diseases, putting the health of residents or employees at risk.
4. Structural Damage:
Neglected drains can lead to water damage and compromise the structural integrity of the building. Moisture seeping into walls and foundations can result in costly repairs and pose long-term risks to the safety of the structure.
5. Unpleasant Work or Living Environment:
Persistent drain odors can have a significant impact on the overall quality of life or work. Unpleasant smells can cause discomfort, reduce productivity, and create an unwelcoming atmosphere for both residents and employees.
The importance of floor drain maintenance cannot be overstated. Regular upkeep not only prevents the foul odors that result from neglected drains but also safeguards the health and well-being of the people in the space.
Why Do Floor Drains Develop Odors?
Before we delve into the solutions, it’s important to understand why floor drains develop odors in the first place. Typically, odors occur due to a buildup of organic matter, such as hair, soap scum, dirt, and food particles, that gets trapped in the drain. The decaying organic matter creates an environment for bacteria and other microorganisms to thrive, resulting in unpleasant odors.
Maintaining a clean and functional environment requires a comprehensive approach, and one often overlooked aspect is the regular cleaning of floor drains. These drains play a crucial role in preventing water damage, foul odors, and potential health hazards. Let’s dive into the significance of regular cleaning step-by-step instructions for a thorough cleaning, and recommendations for establishing a cleaning routine.
Step-by-step instructions for cleaning your floor drain
Regular Cleaning
The first and most important step in preventing floor drain odors is regular cleaning. Establishing a cleaning routine helps remove any accumulated debris and reduces the chances of bacterial growth. Here’s a step-by-step process for cleaning your floor drain:
Remove the drain grate or cover.
Use gloves to manually remove any visible debris or sediment from the drain. You can use a brush or a small scoop for this.
Prepare a mixture of hot water and mild detergent.
Pour the mixture down the drain and scrub the interior of the drain using a long-handled brush or a drain brush specifically designed for this purpose.
Rinse the drain thoroughly with clean water to remove any detergent residue.
Perform this cleaning process at least once a month or more frequently if you notice any odors developing.
Baking Soda and Vinegar
If you’re dealing with stubborn odors, a combination of baking soda and vinegar can prove to be highly effective in eliminating them. Baking soda, or sodium bicarbonate, is a natural deodorizer and mild abrasive, while vinegar is a powerful cleaning agent. Here’s how you can use them to freshen up your floor drain:
Start by pouring a cup of baking soda down the drain.
Follow it with a cup of vinegar.
Let the mixture fizz and react for a few minutes, as it helps break down the organic matter causing the odor.
Finally, flush the drain with hot water to wash away the residue.
This simple home remedy can help neutralize odors and improve the overall freshness of your floor drain. Repeat this process regularly to effectively control unpleasant smells.
Flush with Hot Water
In addition to regular cleaning, flushing your floor drain with hot water is a simple yet effective method to keep it odor-free. Hot water helps melt and flush away any build-up or debris inside the drain pipe. Follow these steps to flush your drain with hot water:
Bring a large pot of water to a rolling boil.
Slowly pour the boiling water down the drain, making sure it reaches the pipe as far as possible.
Repeat this process at least once a week to prevent any build-up and maintain a clean-smelling drain.
Hot water not only helps remove potential odor sources but also improves the overall flow of the drain. It’s a quick and easy maintenance practice that can go a long way in keeping your floor drains odor-free.
Install Drain Traps or Screens
Prevention is always better than a cure. Installing drain traps or screens is a proactive measure to prevent debris and solid particles from entering the drain in the first place. These devices act as filters, capturing hair, dirt, food particles, and other objects before they can become trapped and cause bad smells.
There are various types of drain traps and screens available, including mesh screens, strainers, and built-in traps. Choose one that suits your specific drain type and make sure the device is compatible with your floor drain. Regularly clean and empty the trap or screen to maintain its effectiveness in preventing odors.
Consider Using Citrus-Based Dry Drain Maintainer
In addition to enzyme cleaners, another environmentally friendly option to combat odors in your floor drains is using citrus-based dry drain maintainers. These products utilize the natural cleaning power of citrus to break down organic matter and eliminate odors. Here’s how you can use a citrus-based dry drain maintainer:
Purchase a citrus-based dry drain maintainer designed Vapour Block
for your floor drain system.
Vapour Block
Follow the instructions on the product’s label for the recommended amount to use.
Pour the citrus-based dry drain maintainer down the drain, ensuring it reaches the pipe as far as possible.
Allow the product to sit for the recommended period, typically several hours or overnight.
Flush the drain with hot water to remove any residue and ensure the product is fully rinsed away.
Citrus-based dry drain maintainers not only effectively eliminate odors but also help prevent future buildup, providing a long-lasting solution for odor-free floor drains. Check Brodi for more maintenance items.
Recommended Cleaning Frequency and Tips for Maintaining a Schedule
Frequency:
The recommended frequency for floor drain cleaning depends on factors such as usage and the type of debris present. For residential spaces, a monthly cleaning routine is often sufficient. In high-traffic commercial areas, more frequent cleaning may be necessary.
Establish a Schedule:
Incorporate drain cleaning into your regular cleaning schedule. Whether you clean weekly, bi-weekly, or monthly, consistency is key to preventing issues before they arise.
Monitor High-Traffic Areas:
Pay special attention to drains in high-traffic areas or places where debris accumulates quickly. These areas may require more frequent cleaning to ensure optimal performance.
Professional Maintenance:
If you’ve tried the above methods and are still experiencing persistent odors, it’s time to seek professional help. A plumbing professional can assist you in identifying the root cause of the odor and perform more thorough cleaning and maintenance procedures.
A plumber may use specialized equipment, such as a drain snake or hydro jetting, to remove stubborn clogs or blockages that could be contributing to the odor. They can also inspect the drain pipe for any cracks, leaks, or damaged seals that may require repair or replacement.
While professional maintenance may come with a cost, it offers a comprehensive solution to your floor drain problems and ensures long-term odor prevention.
Installing Drain Traps or Screens: A Key Strategy for Preventing Unpleasant Odors
Installing drain traps or screens is a proactive measure that not only prevents debris from entering your plumbing system but also plays a crucial role in controlling drain odors. In this guide, we’ll explore the importance of prevention, provide an overview of different types of drain traps and screens, offer step-by-step instructions for installation, and share tips for cleaning and maintaining these devices.
The Importance of Prevention in Controlling Drain Odors
1. Odor Prevention:
Drain traps and screens act as barriers, preventing debris and organic matter from entering the drain. By stopping these substances before they can accumulate in the pipes, you significantly reduce the risk of foul odors emanating from the drain.
2. Bacterial Growth Mitigation:
By blocking the entry of debris, drain traps and screens also inhibit the growth of bacteria and fungi in the pipes. This is essential for maintaining a hygienic environment and preventing potential health hazards.
3. Long-Term Maintenance:
Investing in prevention measures ensures long-term maintenance of your plumbing system. Regular cleaning becomes more manageable, and the risk of costly repairs due to clogs or pipe damage is significantly reduced.
Overview of Different Types of Drain Traps and Screens
P-Trap:
The classic P-trap is a U-shaped pipe that holds a small amount of water, creating a barrier between the drain and the air in the pipes. This water barrier prevents sewer gases from entering the living or working space.
Mesh Screens:
Mesh screens are simple, cost-effective devices that fit over the drain opening. They catch hair, debris, and other particles, preventing them from entering the drain.
Basket Strainers:
Commonly used in kitchen sinks, basket strainers are inserted into the drain opening to catch food particles and prevent clogs.
Pop-Up Stoppers:
Often found in bathroom sinks and tubs, pop-up stoppers not only prevent debris from entering the drain but also provide a convenient way to stop or release water flow.
Step-by-Step Instructions for Installing Drain Traps or Screens
Choose the Right Type:
Identify the type of drain trap or screen that best suits your needs based on the type of drain and the potential for debris.
Remove Existing Debris:
Before installing, ensure the drain is free from existing debris. Use a snake or other tools to clear any obstructions.
Install P-Trap:
For P-traps, carefully install the U-shaped pipe, ensuring a proper seal. Tighten the connections, but be cautious not to overtighten and damage the fittings.
Place Screens or Stoppers:
Position mesh screens, basket strainers, or pop-up stoppers over the drain openings. Make sure they fit securely and can be easily removed for cleaning.
Tips for Cleaning and Maintaining Drain Traps or Screens
Regular Inspection:
Periodically inspect the traps or screens for any signs of damage or wear. Replace them if necessary.
Routine Cleaning:
Incorporate regular cleaning of traps or screens into your overall maintenance routine. Remove and clean them to prevent buildup.
Use citrus-based Cleaners:
Consider using citrus-basedVapour Block cleaners to break down organic matter in traps and pipes, promoting optimal functionality.
Professional Maintenance:
If you encounter persistent issues or notice a decline in drainage performance, seek professional assistance. Plumbers can conduct thorough inspections and provide solutions for more complex problems.
Installing drain traps or screens is a practical and effective way to prevent drain odors and maintain a healthy plumbing system. By choosing the right type, following proper installation steps, and implementing routine cleaning and maintenance, you can ensure that these devices continue to serve their purpose effectively, contributing to a clean and odor-free living or working space.
Additional Tips and Best Practices for Floor Drain Maintenance
Keeping Floors and Surrounding Areas Clean and Dry
Maintaining a clean and dry environment around your floor drains is paramount for effective drain performance. Regularly sweep or mop the floors to prevent debris from entering drains, and promptly address spills to avoid potential water damage. A dry environment reduces the likelihood of mold, bacterial growth, and unpleasant odors.
Avoiding Common Mistakes in Floor Drain Maintenance
While caring for your floor drains, it’s crucial to steer clear of common mistakes. Avoid using harsh chemical cleaners that can damage pipes or harm the environment. Additionally, refrain from pouring grease or oil down drains, as these substances can solidify and lead to clogs. Opt for environmentally friendly cleaning solutions and dispose of grease in designated containers.
Regular Inspections for Potential Issues
Implementing routine inspections is a proactive measure to identify potential issues before they escalate. Check for signs of water damage, leaks, or unusual odors around floor drains. Addressing problems at an early stage can save you from more extensive repairs and ensure the continued functionality of your drainage system.
Maintenance Reminders and Checklist
Creating a maintenance checklist and setting regular reminders can help you stay on top of floor drain care. Include tasks such as clearing debris, flushing drains with hot water, and inspecting drain traps or screens. Whether you use digital tools or traditional methods, a checklist ensures that no aspect of maintenance is overlooked.
Maintenance Checklist:
✅ Clear debris from drains.
✅ Flush drains with hot water.
✅ Inspect and clean drain traps or screens.
✅ Check for signs of leaks or water damage.
✅ Use enzyme cleaners for bacterial control.
✅ Conduct periodic professional inspections.
Conclusion
Keeping your floor drains odor-free requires regular maintenance and preventive measures. Incorporating these practices into your cleaning routine will help you eliminate odors and maintain a fresh-smelling environment. Regularly clean your floor drains, use baking soda and vinegar, flush with hot water, install drain traps or screens, consider enzyme cleaners, and seek professional maintenance if needed.
By committing to regular maintenance, you not only prevent potential issues but also contribute to the overall well-being of your living or working space. A clean and odor-free environment awaits those who take the initiative to care for their floor drains. Follow the guide, make it a habit, and enjoy the benefits of a healthier and more pleasant living or working environment.
Water spots on the ceiling are like silent messengers, whispering about hidden troubles within your home. These seemingly innocuous stains often emerge as a result of roof leaks, a common culprit arising from damaged or improperly sealed roofs. When heavy rain or snowmelt infiltrates through compromised shingles or worn-out flashing, it trickles down, leaving its mark on the ceiling. Plumbing issues also play a significant role; even minor pipe leaks can cause substantial damage over time, manifesting as water spots.
Moreover, condensation, especially in poorly ventilated spaces, fosters the ideal environment for water spots to thrive. Understanding that these stains are not merely cosmetic but indicative of deeper issues is the first step towards effective removal. By delving into the root causes, including roof vulnerabilities, plumbing intricacies, and condensation challenges, homeowners can embark on a targeted approach to eliminate these marks and safeguard their ceilings from future intrusions.
Beneath the surface of a water spot lies a story of home maintenance, or the lack thereof. HVAC systems, essential for regulating indoor climate, can turn rogue when drainage lines clog or condensate pans malfunction, leading to unwelcome ceiling stains.
Additionally, in colder regions, ice dams pose a significant threat. When snow accumulates on the roof and then melts, it refreezes at the roof’s edge, creating a dam that prevents proper drainage. This trapped water can seep into the home, resulting in those persistent marks on the ceiling. Exterior factors, including damaged siding or faulty caulking around windows, permit rainwater to find its way indoors. Recognizing the intricate interplay of these factors is vital for homeowners striving to preserve their ceilings’ pristine appearance.
Armed with this knowledge, one can embark on the journey of removal equipped with not just cleaning tools, but a deep understanding of the root causes, ensuring a lasting solution to the challenge of water spots on the ceiling.
Precautions and Safety Measures for Removing Water Spots on Ceiling
Tackling water spots on the ceiling can be a daunting task, but prioritizing safety is non-negotiable. Before you start the ceiling water stain removal process, it’s essential to take the following precautions and safety measures to create a secure environment for yourself and anyone else involved.
Turn Off Electricity: If the water spot is near any electrical fixtures or wiring, the first step is to turn off the electricity in the affected area. Water and electricity are a dangerous combination, and taking this precaution significantly reduces the risk of electrical accidents during the cleaning process.
Wear Protective Gear: Equip yourself with appropriate safety gear, including gloves and safety goggles. Gloves protect your hands from chemicals, dirt, and potential sharp edges, while safety goggles shield your eyes from cleaning solutions and debris dislodged during cleaning.
Use a Stable Ladder: If accessing the ceiling is necessary, use a stable and secure ladder placed on an even surface. Never overreach or stand on the top rungs of the ladder. Having a spotter to hold the ladder steady adds an extra layer of safety, preventing accidents caused by ladder instability.
Ensure Proper Ventilation: Maintain good ventilation in the area you are working in. Open windows and use fans to ensure proper air circulation. Adequate ventilation helps disperse fumes from cleaning products and prevents the accumulation of potentially harmful gases, creating a healthier environment for everyone involved.
Test Cleaning Solutions: Before applying any cleaning solutions or stain removers, test them on a small, inconspicuous area of the ceiling. This test ensures that the solution is compatible with your ceiling material and won’t cause damage or discoloration.
Work in a Well-Lit Area: Proper lighting is essential to see the water spots clearly and to carry out the removal process effectively. Make sure the area is well-lit using natural or artificial light sources, which reduces the likelihood of accidents and ensures a thorough cleaning job.
Keep Children and Pets Away: During the cleaning process, restrict access to the work area. Children and pets should be kept away to prevent accidents and minimize distractions. Creating a controlled environment ensures focused attention and safer conditions for everyone involved.
Proper Disposal of Chemicals: If you’re using chemical cleaning products, follow the manufacturer’s instructions for proper disposal of containers and any leftover solutions. Avoid pouring chemicals down the drain or disposing of them haphazardly to protect the environment and those handling waste.
By adhering to these safety precautions, you not only safeguard yourself and others from potential accidents but also create a conducive environment for efficient and secure water spot removal. Prioritizing safety ensures a smooth and worry-free cleaning process, allowing you to restore your ceiling to its spotless glory.
Methods to Remove Ceiling Water Stains
There are several methods you can try to remove ceiling stains, depending on the cause of the stain and the type of ceiling material. Here are some common methods:
Identify the Cause: Before attempting to remove the stain, it’s important to identify the cause. Ceiling stains can be caused by water leaks, smoke, mold, or other substances. Identifying the cause will help you choose the appropriate method for removal and prevent future stains.
Clean with Soap and Water: For water-based stains or mild stains, you can try cleaning the ceiling with a mixture of mild dish soap and water. Use a sponge or soft cloth to gently scrub the stained area. Be careful not to oversaturate the ceiling, as excessive moisture can damage the ceiling material.
Bleach Solution: For mold or mildew stains, you can create a solution of equal parts water and bleach. Spray or apply the solution to the stained area and let it sit for a few minutes. Then, scrub the area with a sponge or brush. Be sure to wear gloves and work in a well-ventilated area when using bleach.
Vinegar Solution: Vinegar is a natural cleaner that can be effective against certain stains. Mix equal parts of water and white vinegar, apply it to the stain, and let it sit for a while before gently scrubbing the area. Rinse the ceiling with clean water afterward.
Commercial Stain Removers: There are various commercial stain removers available in the market specifically designed for removing ceiling stains. Follow the manufacturer’s instructions carefully when using these products.
Repainting: If the stain is stubborn and cannot be removed completely, you can consider repainting the ceiling. Use a stain-blocking primer to prevent the stain from bleeding through the new paint. Choose a paint color that matches the rest of the ceiling.
Always test any cleaning solution or method in an inconspicuous area of the ceiling first to ensure it doesn’t damage the material further. Safety precautions, such as wearing gloves and ensuring good ventilation, should be followed when using cleaning agents.
Choosing the Right Ceiling Water Stain Remover
When it comes to removing stubborn water spots on your ceiling, specialized products can be a game-changer. However, selecting the right ceiling water stain remover is crucial for an effective and safe cleaning process. One remarkable product that stands out in this regard is the Renew Acoustical Ceiling Tile Restorer from Brodi.
Brodi’s Renew Acoustical Ceiling Tile Restorer is a powerful and innovative solution designed specifically for restoring water-stained ceiling tiles. What sets it apart is its advanced formula, engineered to dissolve stains and revive the original appearance of acoustical ceiling tiles. This product offers a hassle-free application process, making it an ideal choice for both homeowners and professionals.
Key Benefits:
Efficient Stain Removal: Renew Acoustical Ceiling Tile Restorer effectively dissolves water spots and stains on acoustical ceiling tiles, leaving them looking brand new.
Safe for Ceiling Tiles: This product is formulated to be gentle on ceiling tiles while being tough on stains. It ensures thorough cleaning without causing damage or discoloration.
User-Friendly Application: With a user-friendly application process, you can restore your ceiling tiles without the need for extensive expertise. The convenience of use makes it accessible for everyone.
Time and Cost-Effective: By rejuvenating stained tiles, this product saves you the hassle of costly replacements. It offers a cost-effective solution that helps you retain the aesthetics of your space without breaking the bank.
Long-Lasting Results: Renew Acoustical Ceiling Tile Restorer doesn’t just provide a temporary fix. Its long-lasting results ensure that your ceiling tiles remain free from water spots, enhancing the longevity of your investment.
When it comes to specialized products, choosing a reliable and effective stain remover like Renew Acoustical Ceiling Tile Restorer ensures that your ceiling not only looks impeccable but also stands the test of time. With Brodi’s innovative solution, you can bid farewell to water spots and welcome a renewed, spotless ceiling in your home or office space.
Step-by-Step Guide to Using Renew Acoustical Ceiling Tile Restorer
Renew Acoustical Ceiling Tile Restorer is a specially formulated solution designed to rejuvenate and restore acoustic ceiling tiles. Whether your tiles are stained due to water damage, smoke, or general wear and tear, this restorer can help revive their original appearance. It works on various types of ceiling tiles, including mineral fiber and fiberglass, and provides long-lasting results. Lets jump to the using guide:
Step 1: Gather Your Supplies
Before you begin, make sure you have all the necessary supplies, including Renew Acoustical Ceiling Tile Restorer, a clean cloth or sponge, and a ladder if your ceiling is out of reach.
Step 2: Prepare the Area
Clear the area beneath the ceiling tiles to avoid any potential mess. Lay down drop cloths or plastic sheets to protect your floors and furniture.
Step 3: Clean the Ceiling Tiles
Start by cleaning the ceiling tiles to remove dust, dirt, and grime. Use a mild soap and water solution or a gentle all-purpose cleaner to wipe down the tiles. Allow them to dry completely before moving on to the next step.
Shake the Renew Acoustical Ceiling Tile Restorer well before use. Pour a small amount onto a clean cloth or sponge and apply it evenly across the surface of the ceiling tiles. Work in small sections to ensure thorough coverage.
Step 5: Let It Dry
Allow the restorer to dry completely. Drying times may vary depending on the product and environmental conditions. Refer to the product label for specific instructions.
Step 6: Inspect the Results
Once the ceiling tiles are completely dry, inspect the results. You’ll likely notice a significant improvement in the color and overall appearance of the tiles. If necessary, repeat the process for stubborn stains or areas that require additional attention.
Step 7: Enjoy Your Revitalized Space
With your ceiling tiles restored to their original beauty, step back and admire the transformation. Your space will look fresher, brighter, and more inviting, all thanks to Renew Acoustical Ceiling Tile Restorer.
Renew Acoustical Ceiling Tile Restorer offers a convenient and effective solution to refresh your space without the hassle and cost of replacing ceiling tiles. By following these simple steps, you can easily restore your ceiling tiles and enjoy a more aesthetically pleasing environment.
Ready to transform your space? Click here to purchase Renew Acoustical Ceiling Tile Restorer and experience the difference for yourself. Say goodbye to stained and worn-out ceiling tiles and hello to a revitalized, appealing space! Visit Brodi for more items!
Professional Assistance – When to Call in the Experts
Dealing with ceiling water stains can be a daunting task, especially when the root cause is elusive or the stains persist despite your best efforts. In such situations, knowing when to seek professional assistance can save you time, money, and stress.
Complex Water Damage:
If your ceiling is marred by extensive water stains that seem to spread with time, it’s a clear indicator of a complex water damage issue. Professional experts possess the experience to assess the severity of the damage accurately. Their expertise enables them to identify hidden leaks and structural vulnerabilities that might not be visible to the untrained eye. Addressing complex water damage promptly not only restores your ceiling but also prevents potential structural issues in your home.
Persistent Stains:
Stubborn water spots that reappear after repeated removal attempts signify an underlying problem. Professionals can conduct meticulous inspections to determine the cause of these persistent stains. Their diagnostic skills enable them to identify hidden leaks, ensuring that the root cause is effectively eliminated. By addressing both the visible stains and the hidden issues, experts provide a lasting solution that prevents the recurrence of water spots.
Mold Growth and Health Concerns:
Water spots often create a breeding ground for mold and mildew, posing health risks to your household. If you notice mold accompanying the water stains, it’s an indication of prolonged moisture exposure. Professionals are equipped to handle mold remediation safely and efficiently. They not only remove visible mold but also implement measures to prevent its return, ensuring a clean, healthy environment for your family.
Structural Integrity Concerns:
Ceiling water stains, if left unattended, can compromise the structural integrity of your home. Professionals conduct thorough assessments to evaluate if the water damage has weakened the structural components. Their expertise allows them to reinforce weakened structures, ensuring the safety and stability of your home. By preserving the structural integrity, experts provide long-term protection against potential hazards.
Insurance Claims and Documentation:
In situations involving extensive water damage, involving professionals is essential for insurance purposes. Insurance companies often require detailed documentation of the damage and the restoration process. Certified experts understand the intricacies of insurance claims and provide comprehensive reports, photographs, and documentation. Their expertise streamlines the claims process, ensuring that you receive rightful compensation for the necessary repairs.
Calling in the experts for ceiling water stain removal is crucial when facing complex issues, persistent stains, mold growth, structural concerns, or insurance-related needs. Their specialized knowledge and skills not only restore your ceiling but also provide peace of mind, knowing that your home is in capable hands. By investing in professional assistance, you ensure the longevity, safety, and aesthetics of your living space.
Keeping Your Ceiling Spotless in the Future
Maintaining a spotless ceiling requires a proactive approach focused on prevention. Regular inspections are the cornerstone of this strategy.
✅ Routinely check your roof for damaged shingles, ensuring they’re intact to thwart leaks during heavy rainfall.
✅ Keeping gutters and downspouts clean is equally essential; debris buildup can cause water overflow, leading to stains.
✅ Adequate attic insulation not only enhances energy efficiency but also prevents heat escape, curbing the formation of ice dams that can cause water seepage.
✅ Proper ventilation in moisture-prone areas like bathrooms and kitchens reduces condensation, minimizing the risk of water spots.
✅ Seal gaps and cracks in your home’s exterior, including windows and doors, using high-quality sealants to block external water infiltration.
✅ Regularly inspect plumbing fixtures, pipes, and appliances for leaks; even a minor drip can lead to significant damage over time.
✅ Address any plumbing issues promptly.
✅ Invest in a quality roof coating. This protective layer adds an extra shield against water penetration.
By remaining vigilant and proactive in your maintenance efforts, you create a robust defense against water stains. Through these preventive measures, you not only preserve the aesthetic appeal of your ceiling but also ensure the longevity and integrity of your entire home.
Few household nuisances are as frustrating as slow-running or clogged drains. Whether it’s a sluggish bathtub drain or a sink that takes forever to clear, these issues can disrupt your daily routine and lead to unpleasant odors and potential water damage. Fear not, though; with a bit of knowledge and some basic tools, you can often tackle these problems on your own, saving time and money on professional plumbing services. In this in-depth guide, we’ll explore common causes of slow-running or clogged drains and provide effective solutions tailored to various scenarios.
Understanding Slow-Running Drains:
Before we dive into the solutions, it’s essential to understand why drains become slow or clogged in the first place. Various factors can contribute to this problem, including:
1. Hair and Soap Scum: In bathroom drains, hair and soap scum are common culprits for clogs. Over time, they can accumulate and restrict water flow.
2. Food Debris: In kitchen sinks, food particles, grease, and soap residue can build up in the drain, causing slow drainage.
3. Foreign Objects: Sometimes, foreign objects like jewelry or small toys can accidentally fall into drains, causing blockages.
4. Mineral Buildup: In areas with hard water, mineral deposits can accumulate in pipes, reducing their diameter and slowing water flow.
5. Tree Roots: In outdoor drains, invasive tree roots can penetrate pipes, causing blockages and damage.
How to Prevent a Clogged Drain
Preventing a clogged drain is far easier than dealing with the messy aftermath. With a few simple habits and preventive measures, you can significantly reduce the chances of your sinks, showers, and tubs succumbing to a clog.
1. Use Drain Screens: One of the easiest and most effective ways to prevent clogs is by using drain screens or catchers. These inexpensive devices fit over your drain openings, trapping hair, soap scum, food particles, and other debris before they enter the pipes. Regularly empty the screens and clean them to ensure optimal functionality.
2. Be Mindful of What Goes Down: Avoid treating your drains like garbage disposals. Don’t pour grease, oil, or large food scraps down the kitchen sink. Dispose of cooking oil in a container, and throw food scraps into the compost bin or trash. In the bathroom, dispose of facial tissues, cotton balls, and dental floss in the trash instead of flushing them down the toilet.
3. Regular Hot Water Flushing: Pouring hot water down the drain regularly can help dissolve accumulated grease and soap residue, keeping the pipes clear. Make it a monthly habit to pour a kettle of boiling water down each drain in your home. This simple practice can prevent buildup and keep water flowing freely.
4. Regular Cleaning: Clean your drains regularly, even if they aren’t showing signs of a clog. For kitchen sinks, bathroom sinks and tubs, use fix clogged drainssolution and remove the drain stoppers and clean them thoroughly, removing any hair or debris that might have accumulated. Regular cleaning prevents the gradual buildup of substances that lead to clogs.
5. Be Careful with Chemical Cleaners: While chemical drain cleaners can be effective, they are also harsh on your pipes and the environment. If you choose to use them, follow the instructions carefully and consider natural alternatives first. Chemical cleaners should be a last resort and used sparingly to avoid damaging your plumbing system.
6. Professional Drain Inspections: Consider scheduling regular professional drain inspections, especially if you live in an older home or suspect underlying issues. Plumbers can use specialized tools like drain cameras to inspect the interior of your pipes, detecting potential problems before they escalate into full-blown clogs.
By adopting these preventive measures and being mindful of what goes down your drains, you can significantly reduce the risk of encountering clogged pipes. Regular maintenance and a few simple habits can save you from the inconvenience and expense of dealing with blocked drains, ensuring a smoothly flowing plumbing system in your home.
Choosing the Best Drain Cleaner for Kitchen, Bathroom and Other Drain Clogs
When it comes to tackling stubborn clogs in your kitchen, bathroom, or any other drain in your home, finding a powerful yet safe solution is paramount. Liquiflo Drain Cleaner emerges as a reliable choice, offering a multitude of benefits and versatile applications.
Benefits of Liquiflo Drain Cleaner:
Fumeless and Odorless: Liquiflo Drain Cleaner stands out as a fumeless and odorless option. This feature makes it perfect for use in all areas, ensuring that offensive odors and fumes won’t disturb your surroundings.
Effective Kitchen Solution: In kitchen drains, Liquiflo Drain Cleaner excels at breaking down food build-up and coffee grounds. Its powerful formula dissolves organic matter, grease, and oils, leaving your kitchen drains clear and free-flowing.
Ideal for Bathtubs: Liquiflo Drain Cleaner is specifically designed to tackle hair and soap build-up inside drain pipes, making it a perfect choice for bathtubs. It effortlessly dissolves accumulated residues, ensuring your bathwater drains smoothly.
Prevents Unpleasant Odors: As a drain maintainer, Liquiflo keeps drain lines clear and free-flowing, which, in turn, reduces offensive odors. This is particularly beneficial in environments where the accumulation of rancid organic materials can lead to unpleasant smells.
Versatile Usage in Various Settings: Liquiflo Drain Cleaner is not just limited to home use. It is highly recommended for preventive maintenance in drinking fountains, making it an excellent choice for public spaces and commercial establishments.
Perfect for Specialized Facilities: Its efficacy is not limited to regular drains. Liquiflo is an excellent solution for plaster traps commonly found in dental offices and hospital fracture clinics. It is also a go-to option in hospitals and healthcare facilities for breaking down biofilm accumulation in drains, ensuring a hygienic environment.
Unclogs Various Fixtures: Liquiflo Drain Cleaner is versatile enough to be used in floor drains, toilets, urinals, and any other blocked or slow-running drains. Its powerful formula dissolves blockages, allowing water to flow freely once again.
Liquiflo fix clogged drains stands as a potent solution for a variety of drain-related challenges. Its fumeless and odorless nature, coupled with its effectiveness in dissolving a wide range of materials, makes it an ideal choice for both home and commercial use. From kitchens to bathrooms, public areas to specialized facilities, Liquiflo Drain Cleaner offers a versatile and reliable way to keep your drains clear, free-flowing, and odor-free. Choosing Liquiflo means choosing efficiency, versatility, and a hassle-free solution to your drain clogging woes.
Preventing Future Issues:
Regular Cleaning: Run hot water down the drains weekly to help prevent the buildup of soap scum and grease.
Use Drain Strainers: Install drain strainers in sinks and bathtubs to catch hair and debris, preventing them from entering the drains.
Be Mindful of What Goes Down the Drain: Avoid pouring grease, coffee grounds, or food particles down the sink. Dispose of these items properly.
Monthly Maintenance: Consider a monthly maintenance routine using fix clogged drainsproduct to keep drains clear.
By following these steps and staying vigilant about preventive measures, you can effectively tackle slow-running or clogged drains in your home. Remember, patience and persistence are key, and if a clog persists despite your efforts, don’t hesitate to seek professional plumbing assistance. With the right techniques and a proactive approach, you can keep your drains running smoothly, ensuring a hassle-free plumbing experience in your household.